Importing a Microsoft Word template

Dennis
Last Update 3 years ago
When you already have a file Word you want to import and eventually modify you can import it into Trakti.
Here is our walk-through video:
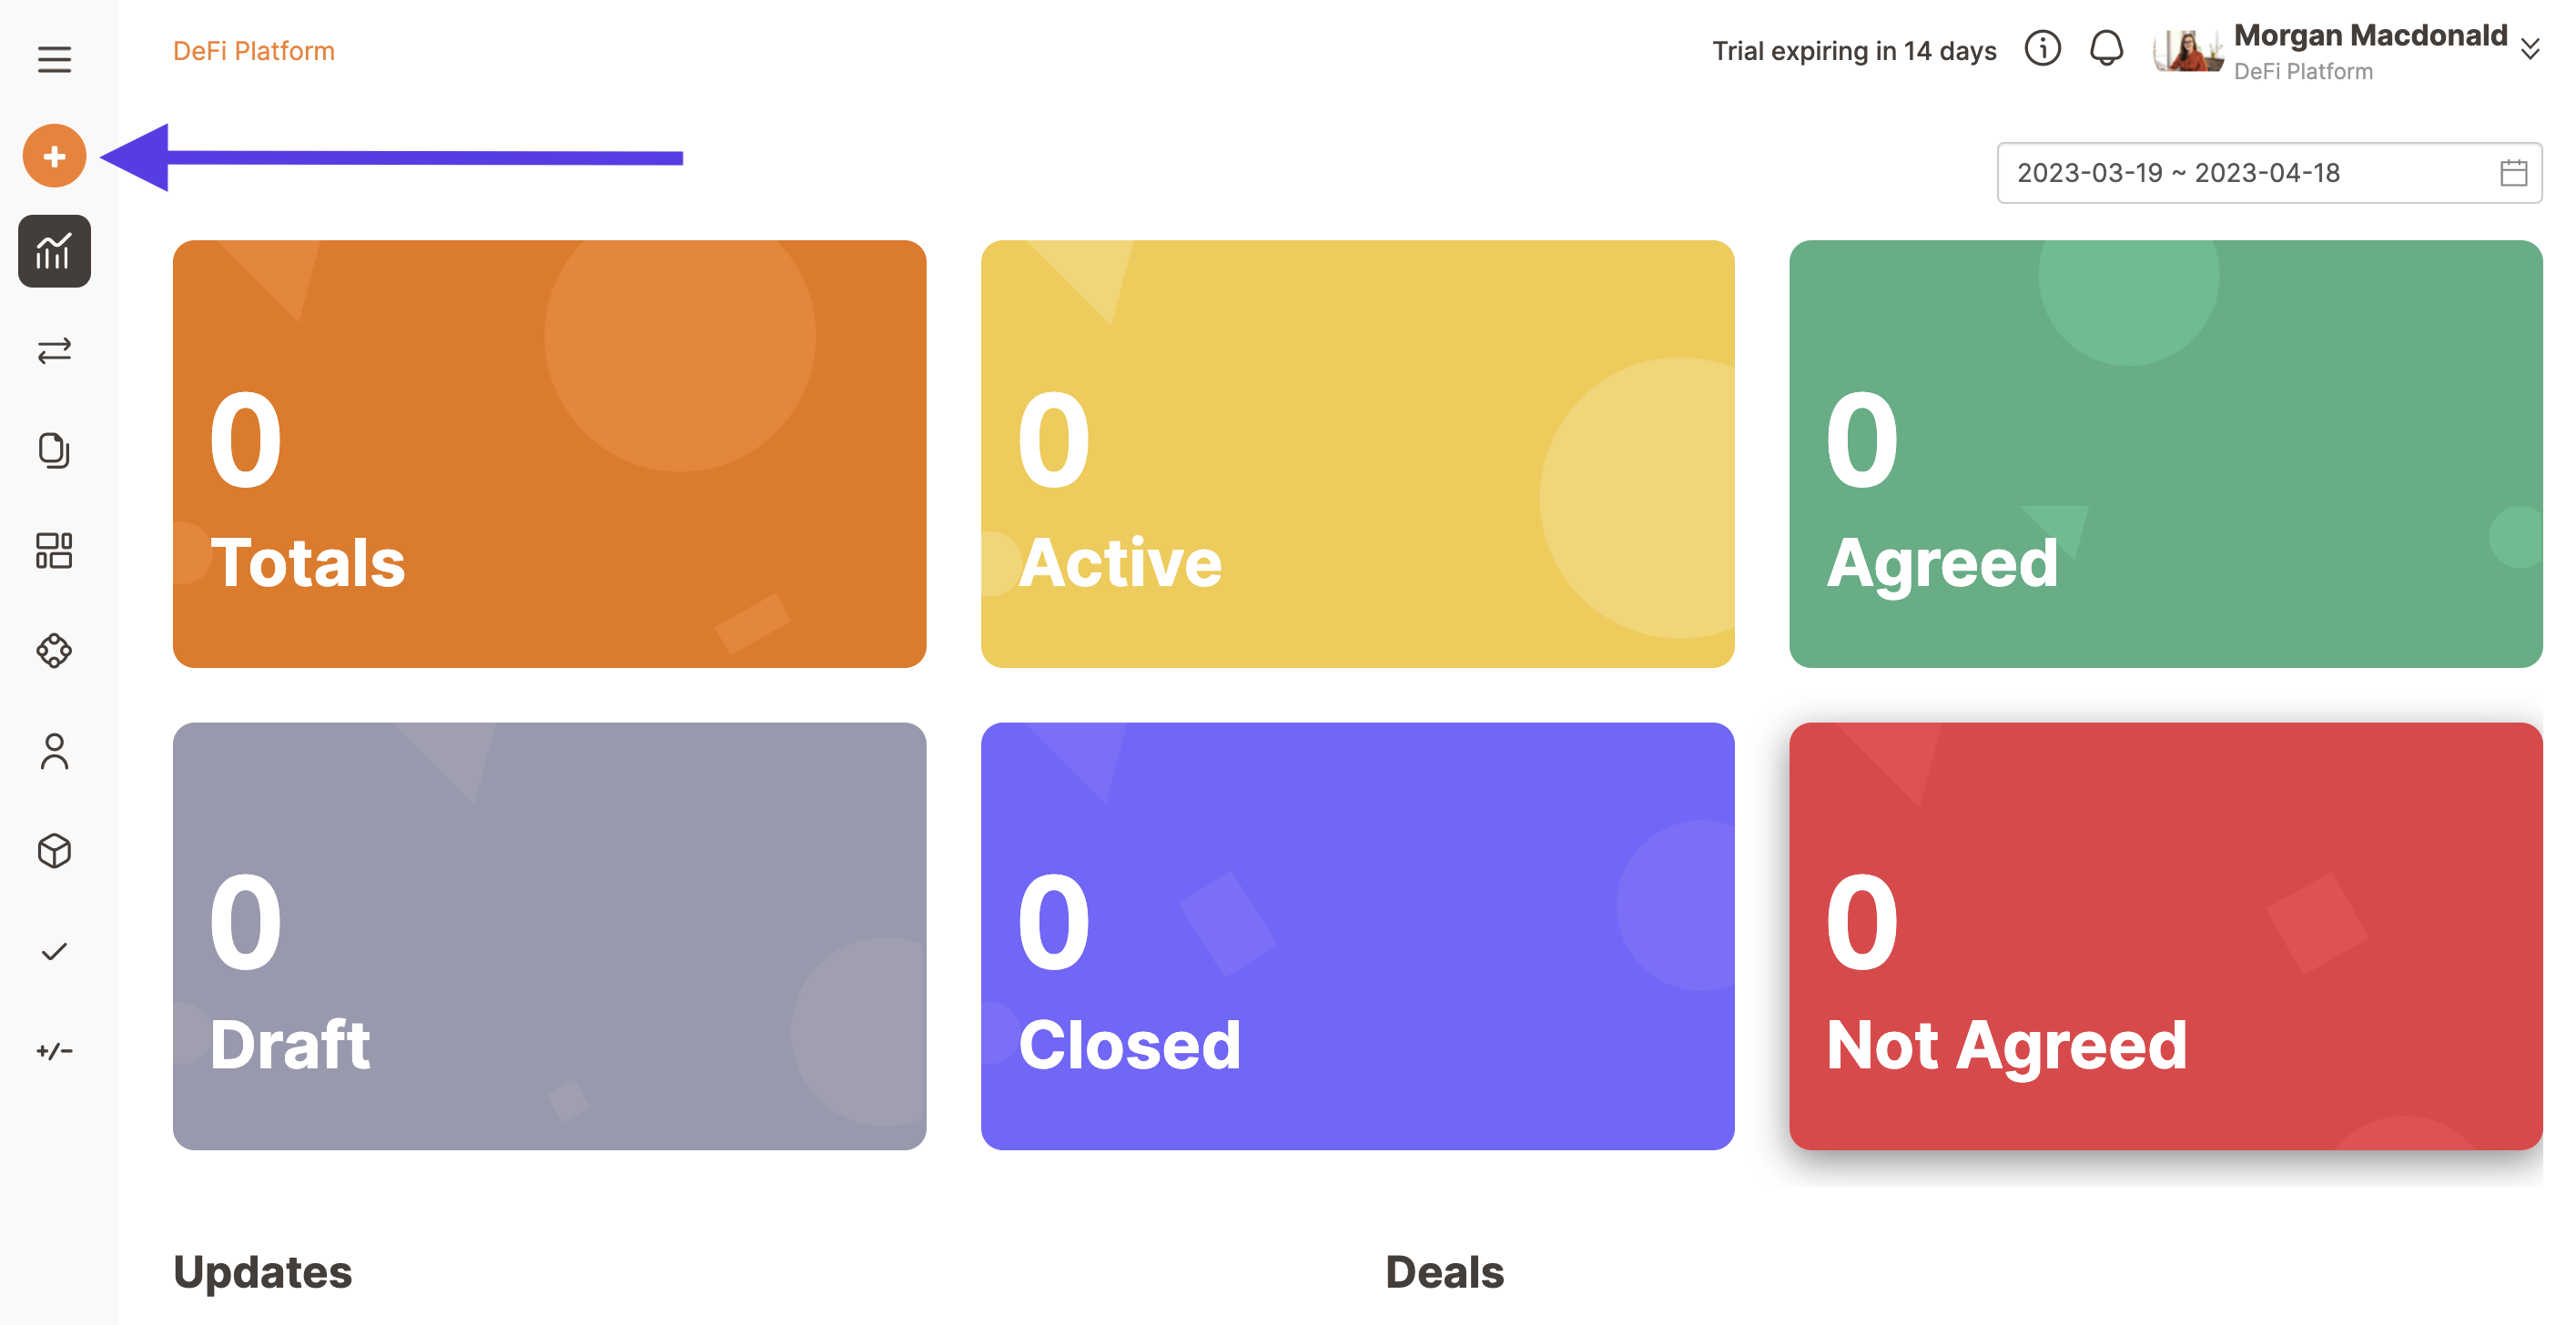
Just begin by clicking on the Plus button on the left navigation bar.
Click on Contract model.
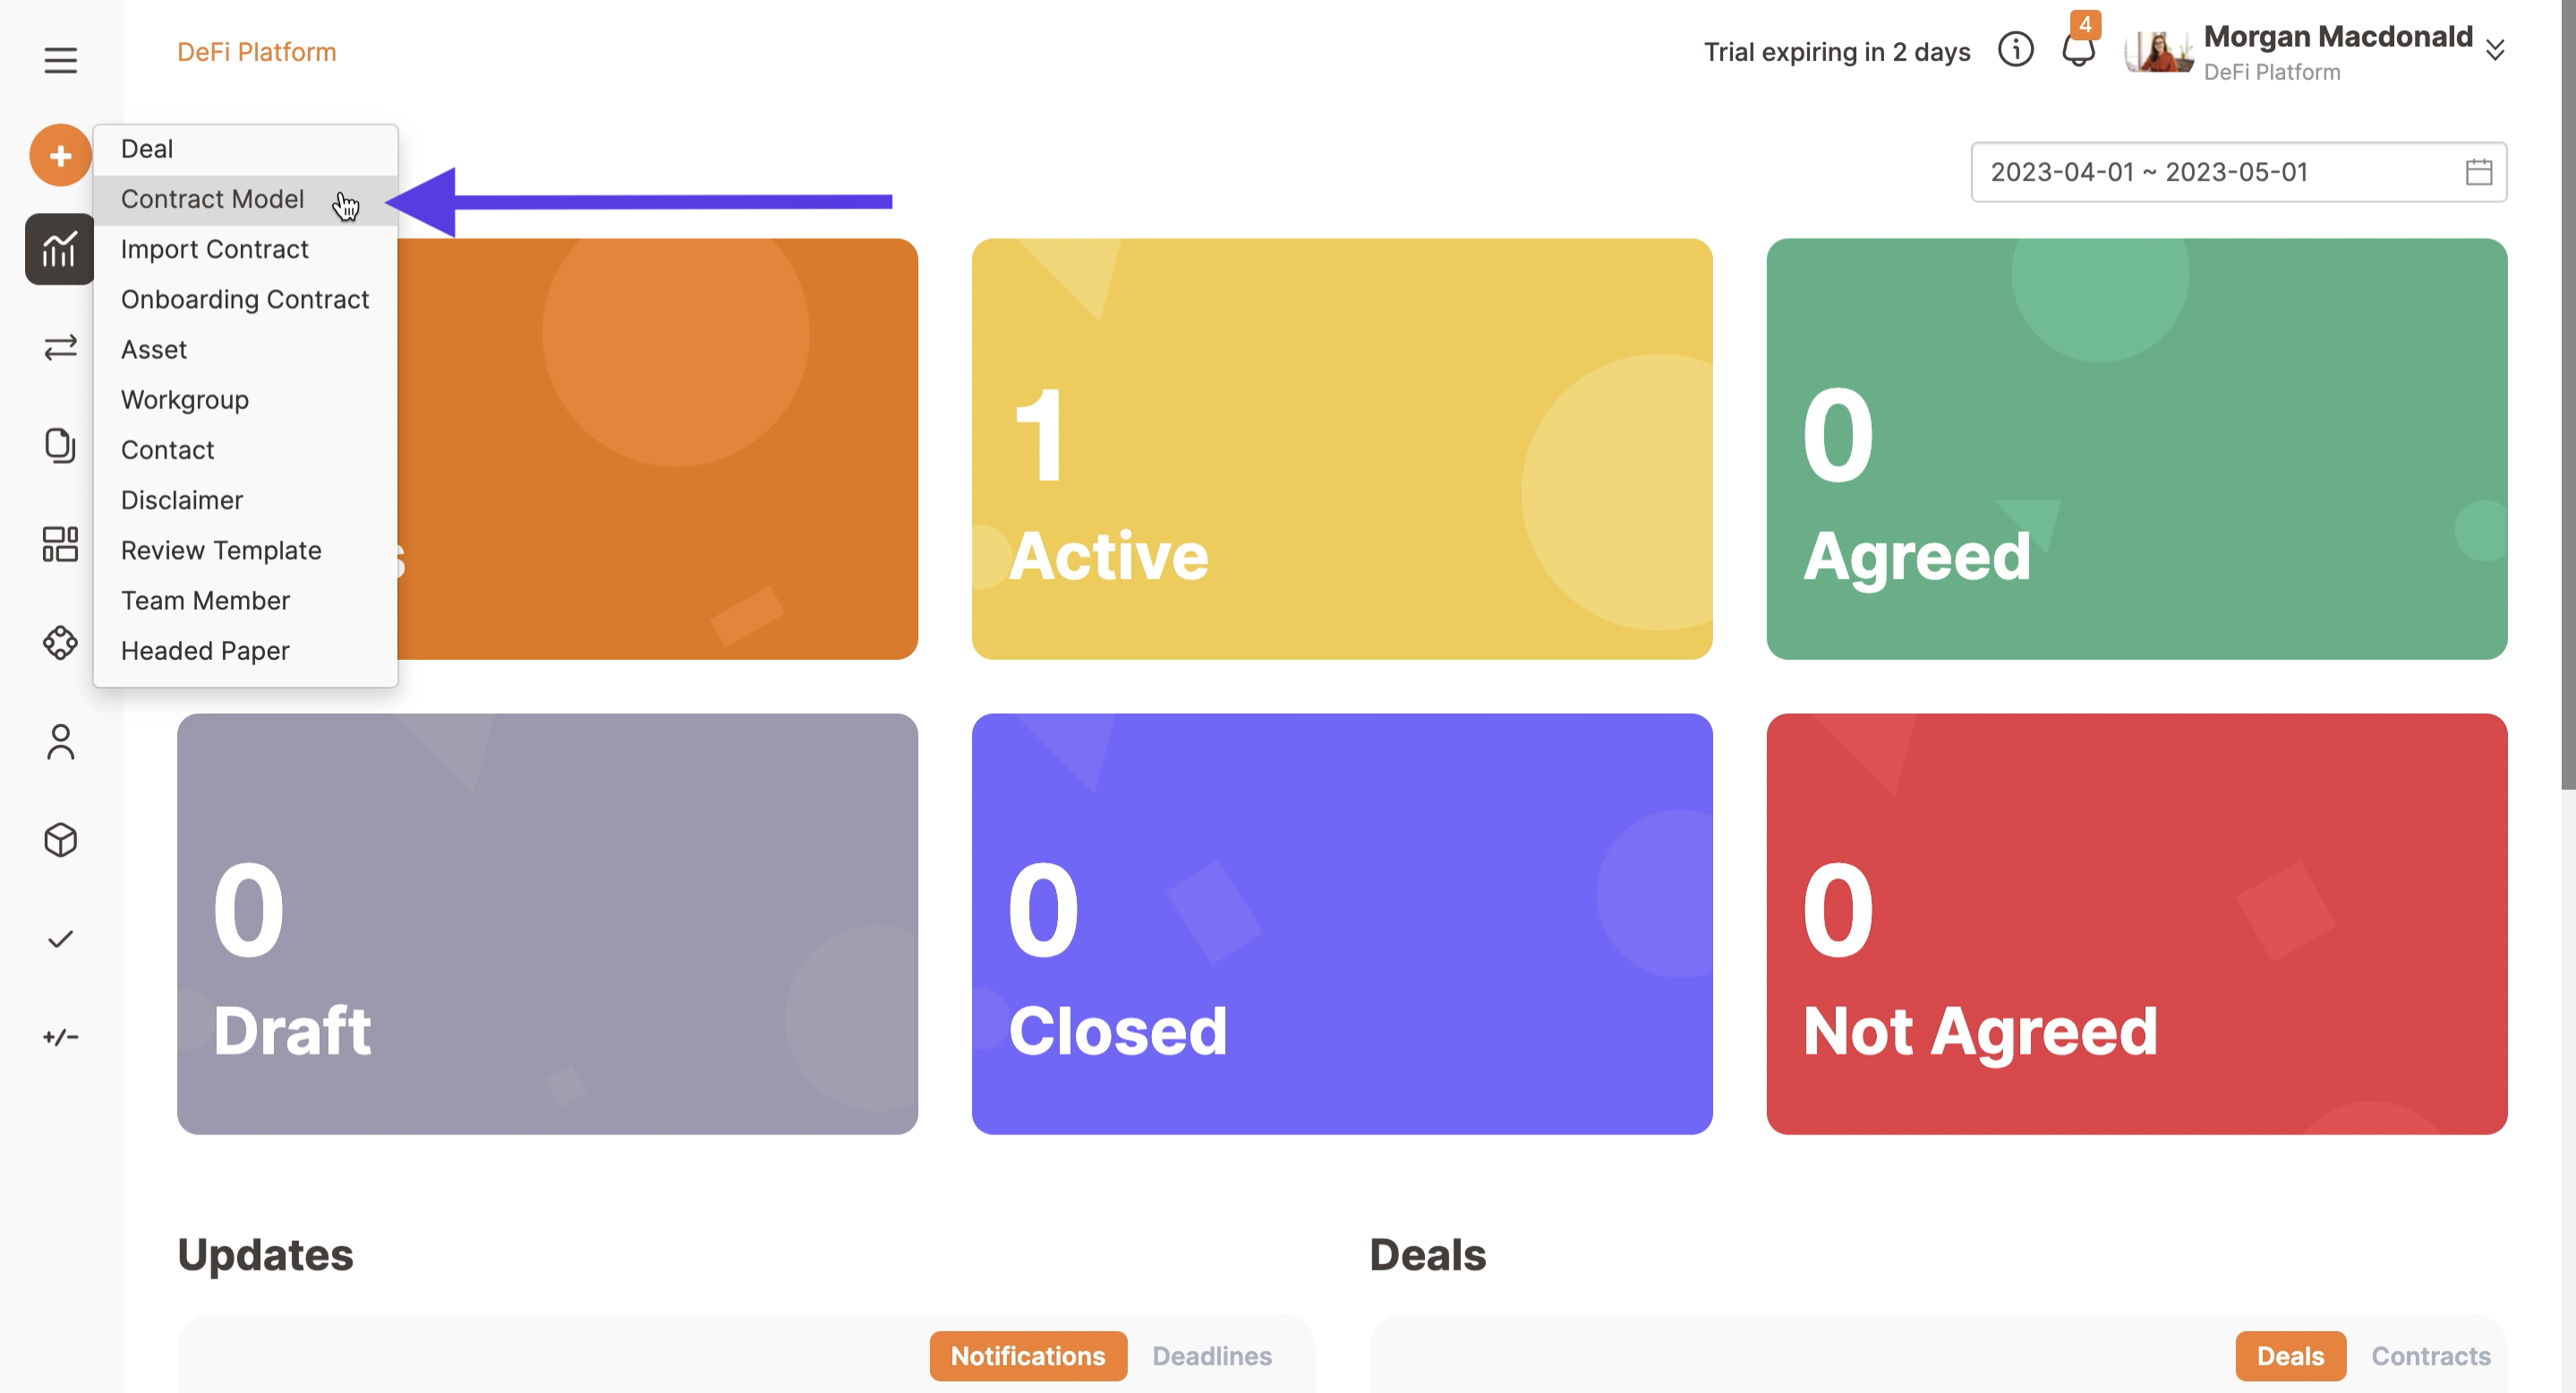
Then select Blank template.

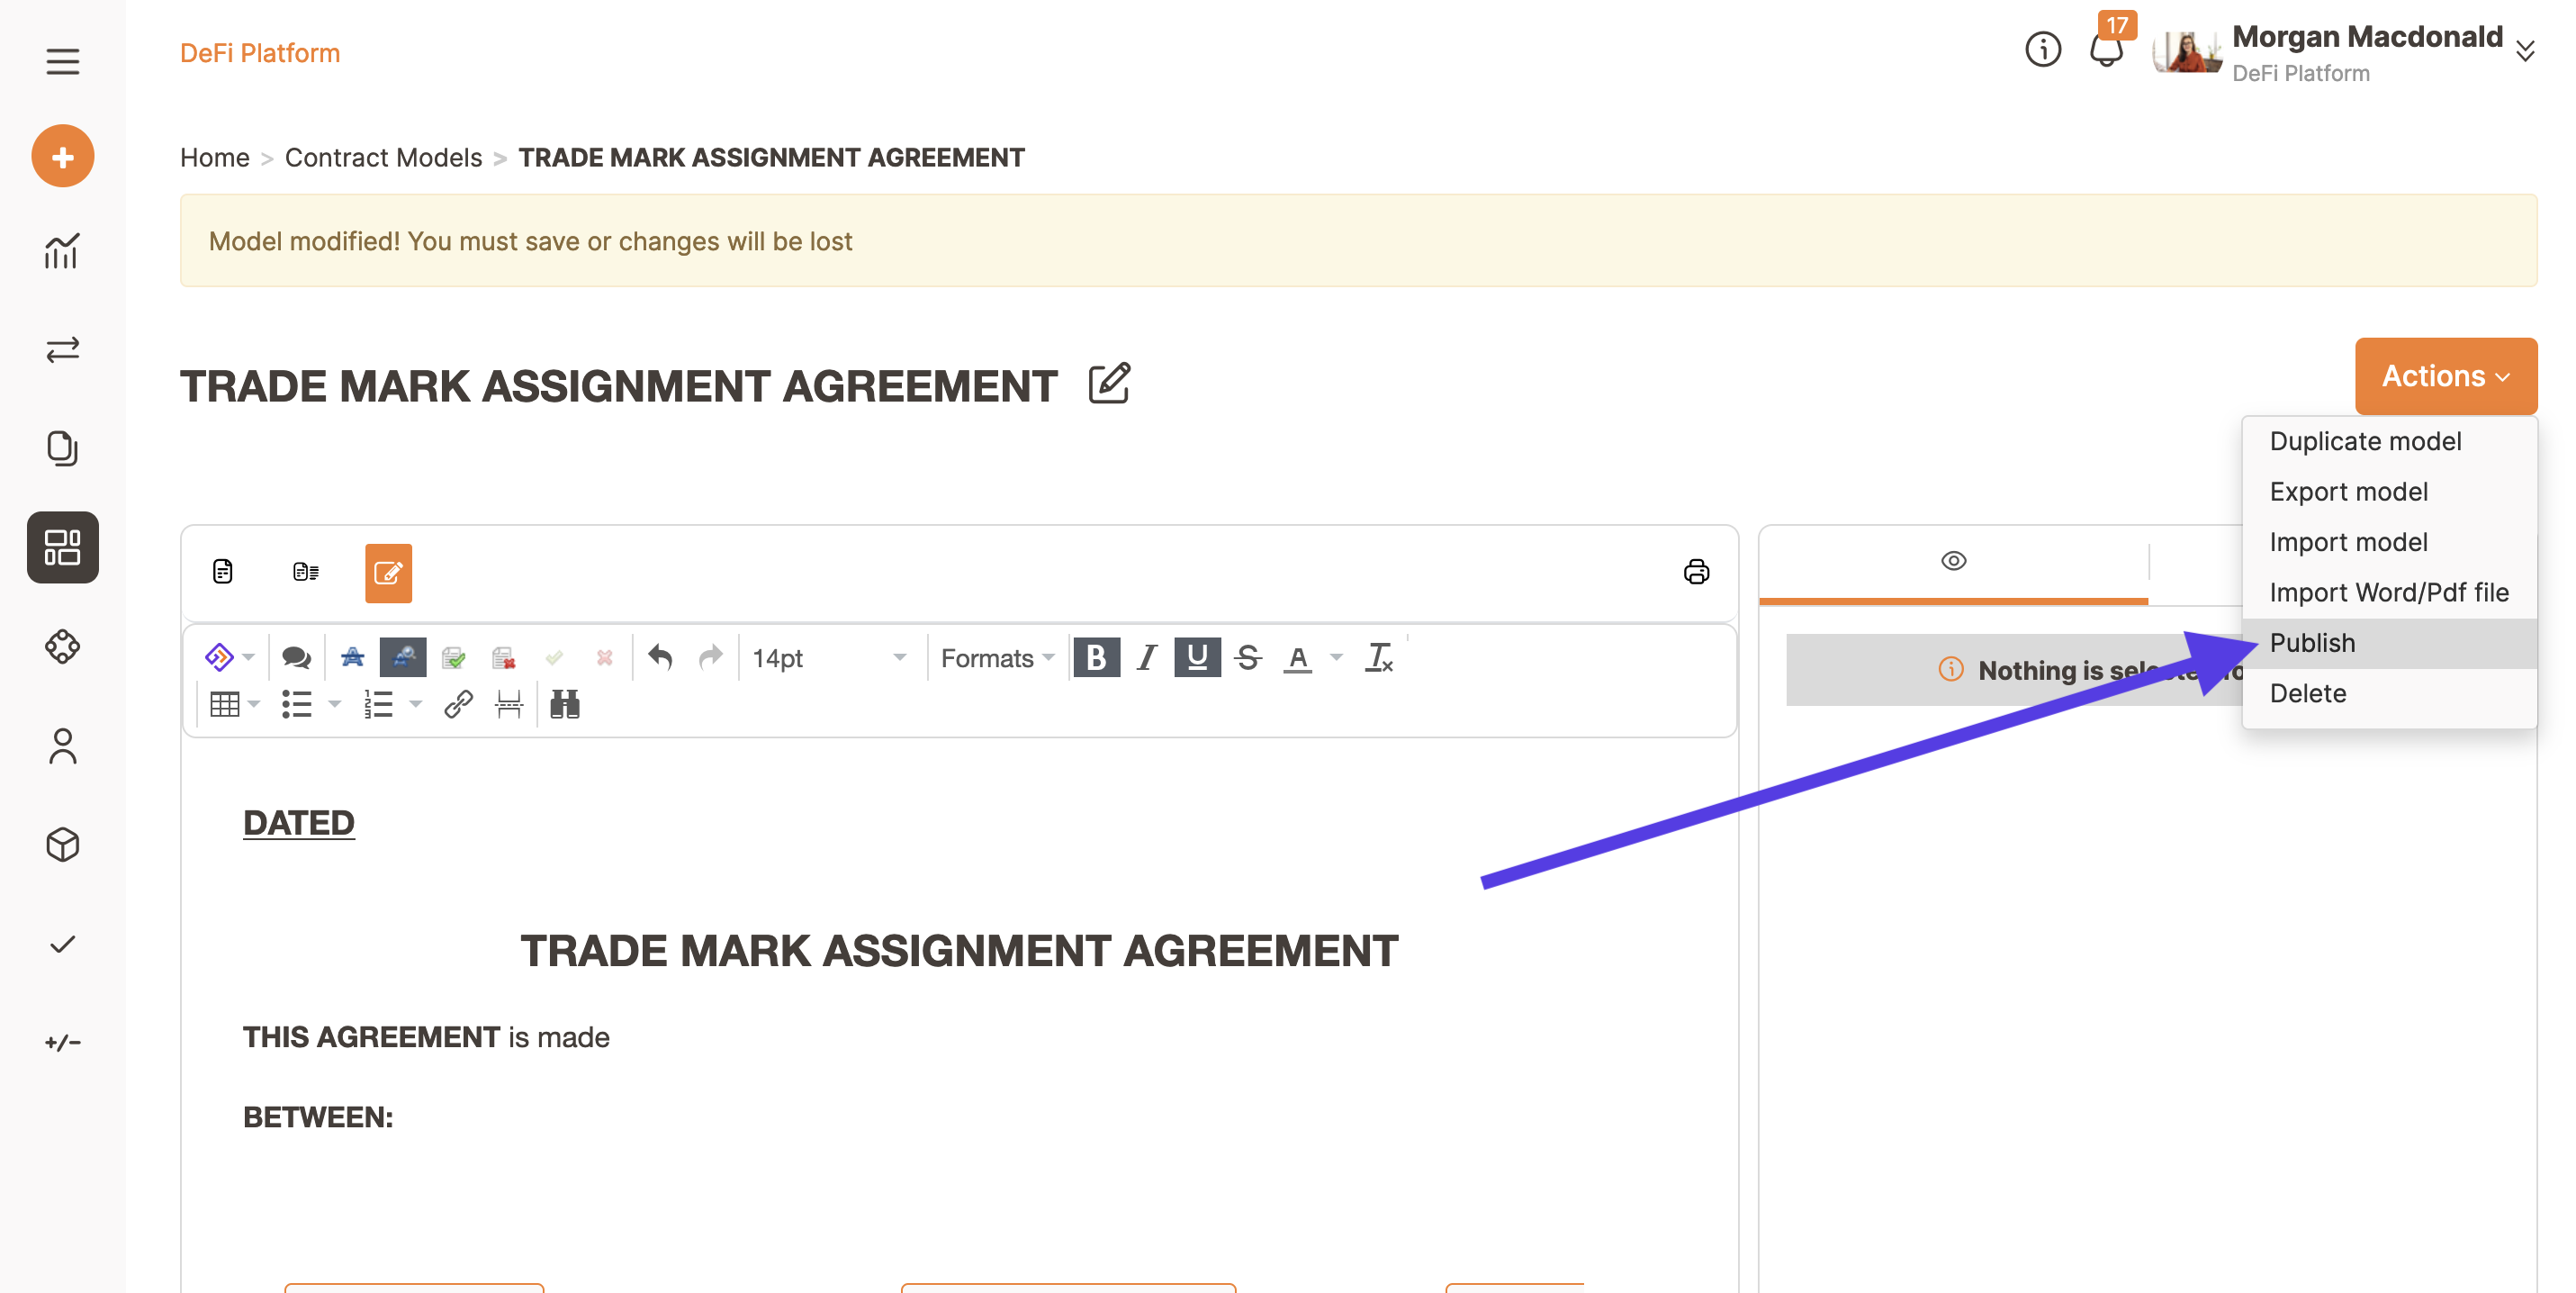
Now you can click on Actions and then on Import your Word/PDF file. This will open a popup that will let you select from your device the word template you want to import in Trakti.
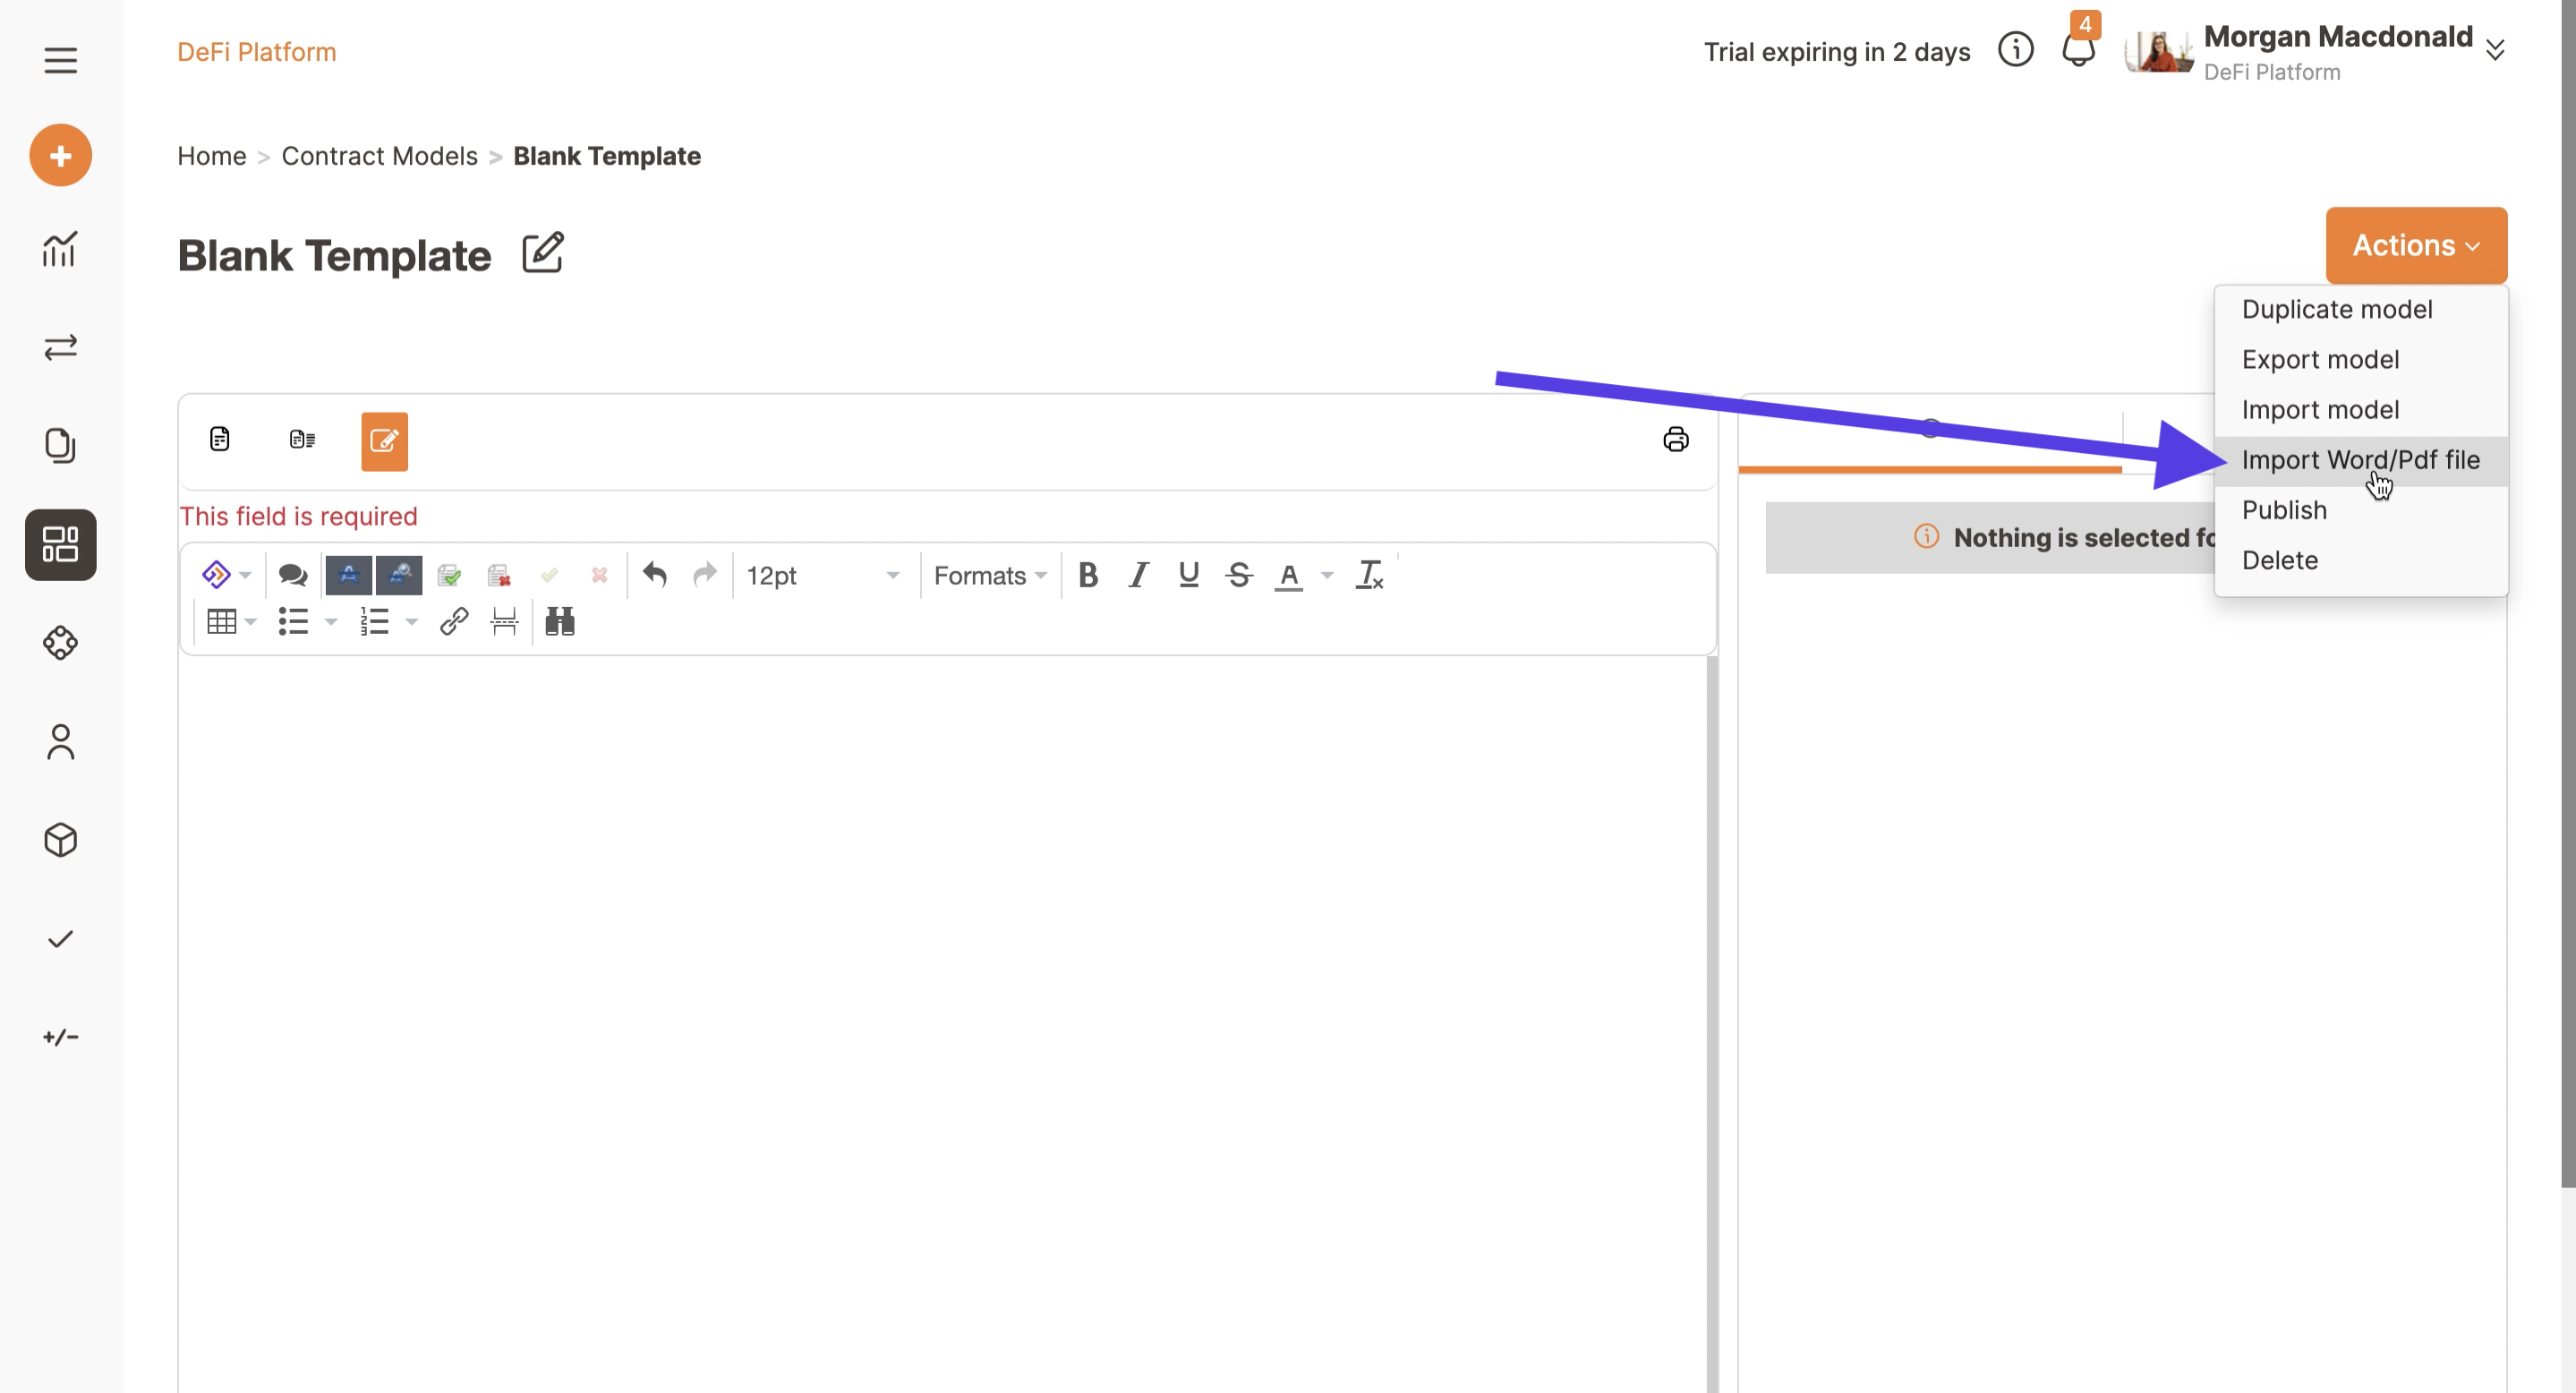
Select and confirm the contract you want to import. Trakti will now analyse the file and verify the formatting and will try to maintain a correct structure, compatible with our logic.
If the document structure is incompatible, the system will still import the file as plain text. In order to avoid plain text importing the word should be well structured, (correct Headings and Numbered lists should be used) and has to be cleaned from:
- Header and footer,
- Page numbers,
- Images,
- Signature fields.
Deleting those elements will reduce errors during importing.
The major difference in importing structured text rather than plain text is that the system will recognise clauses and numbering therefore if you will need to add a clause it will list those correctly and during negotiations it can perform analysis (only for corporate plan).
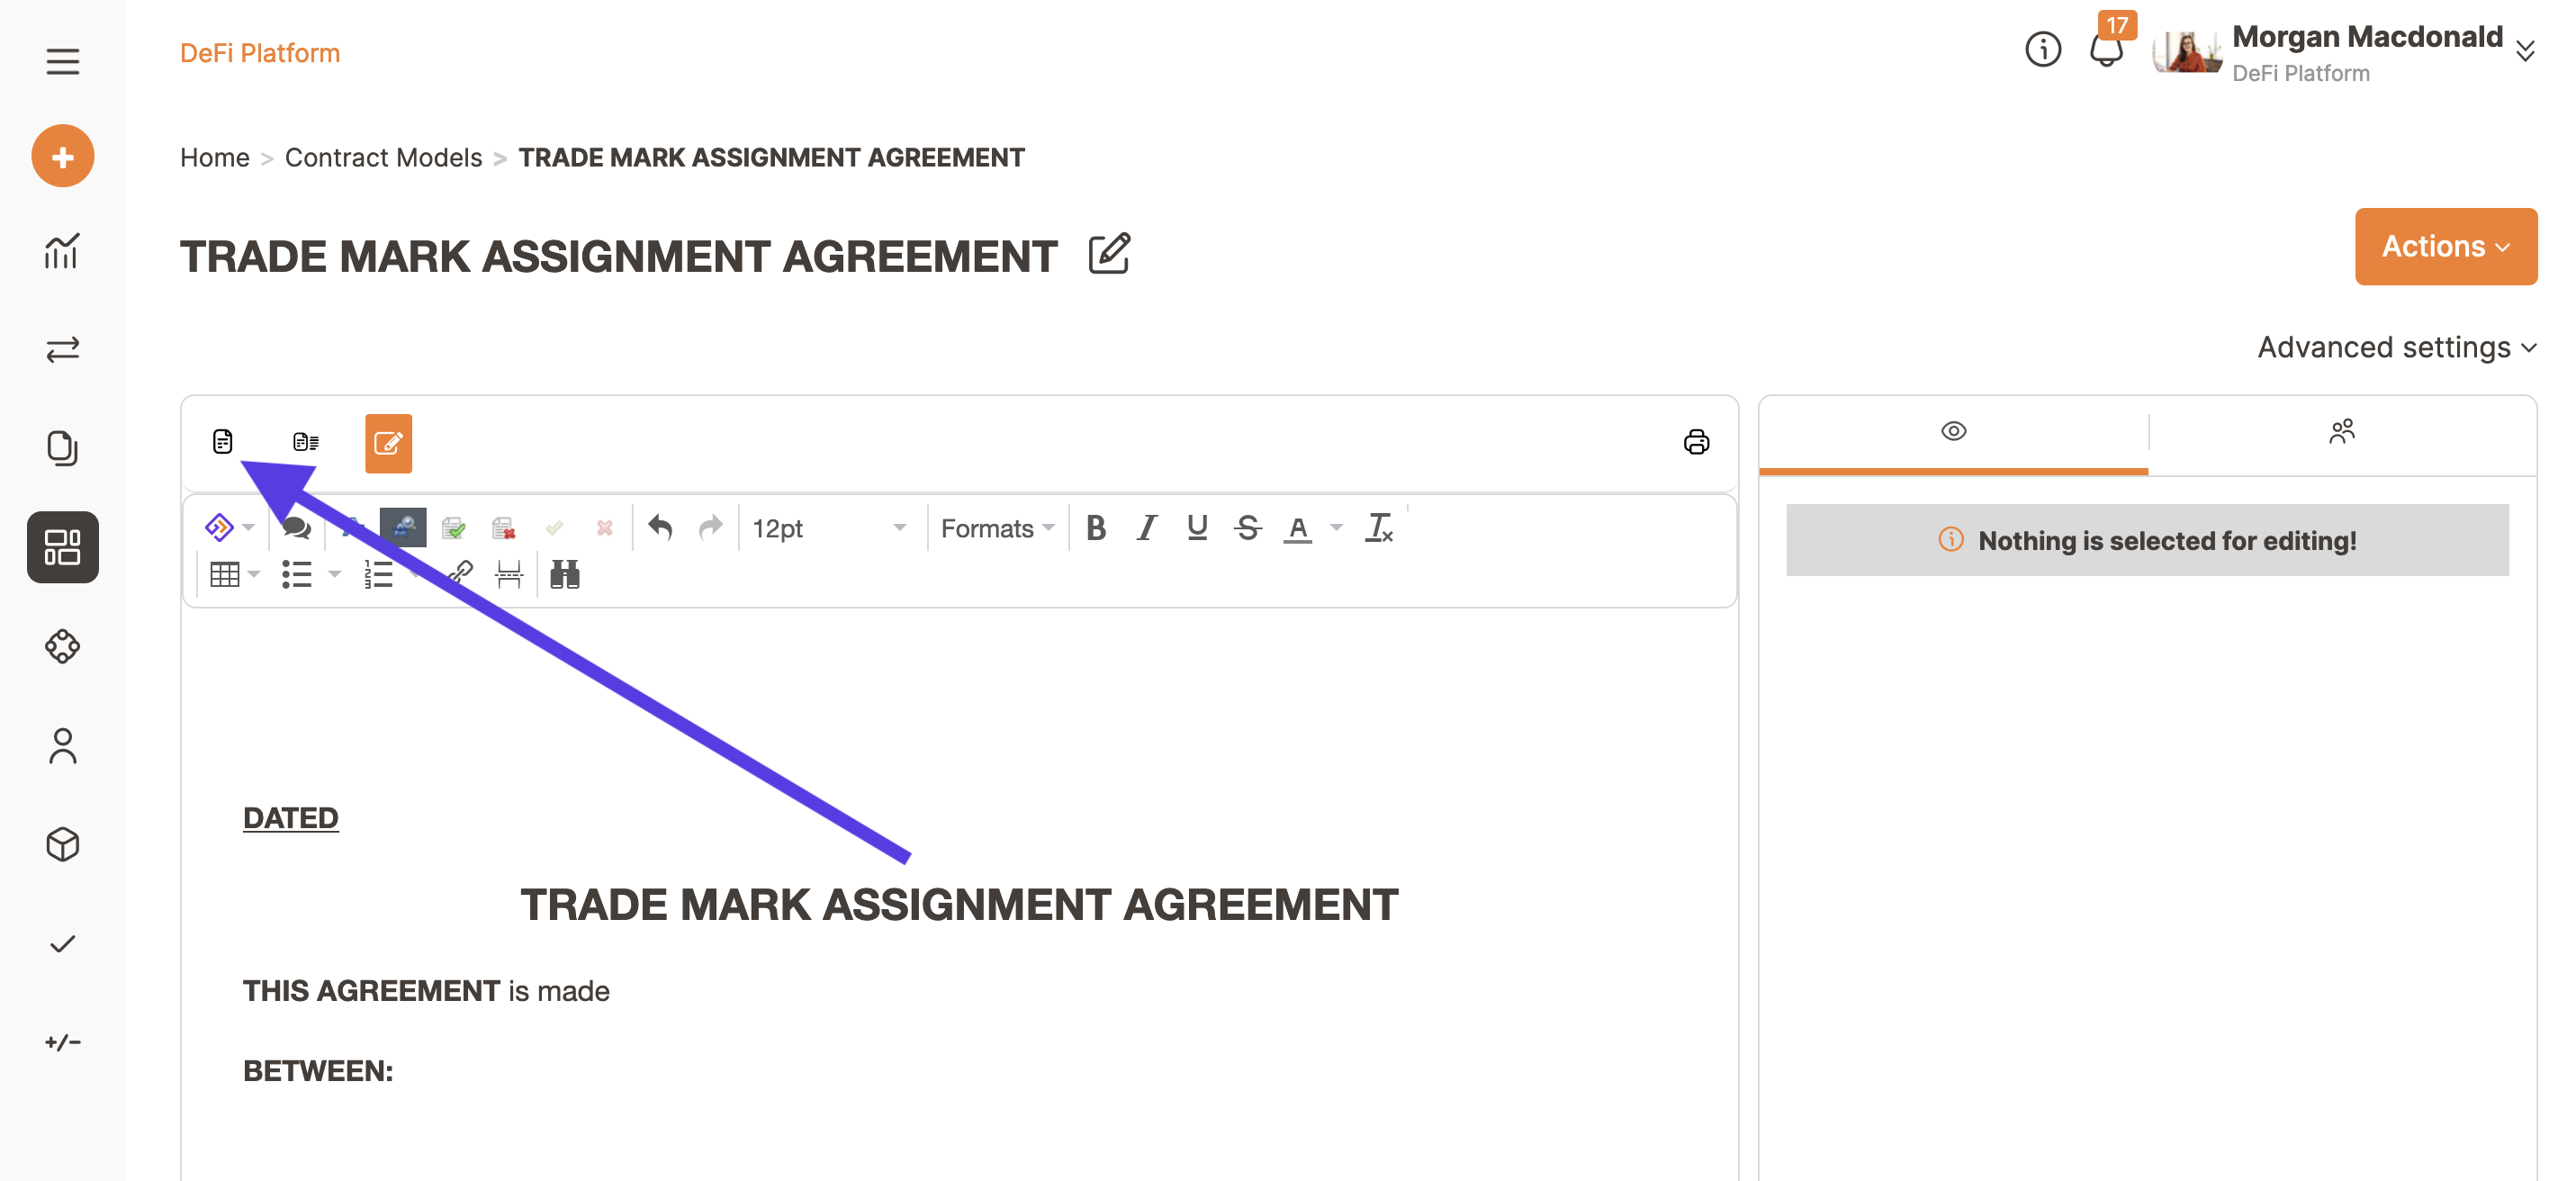
The content of the Word file will be imported and showed inside the editor.
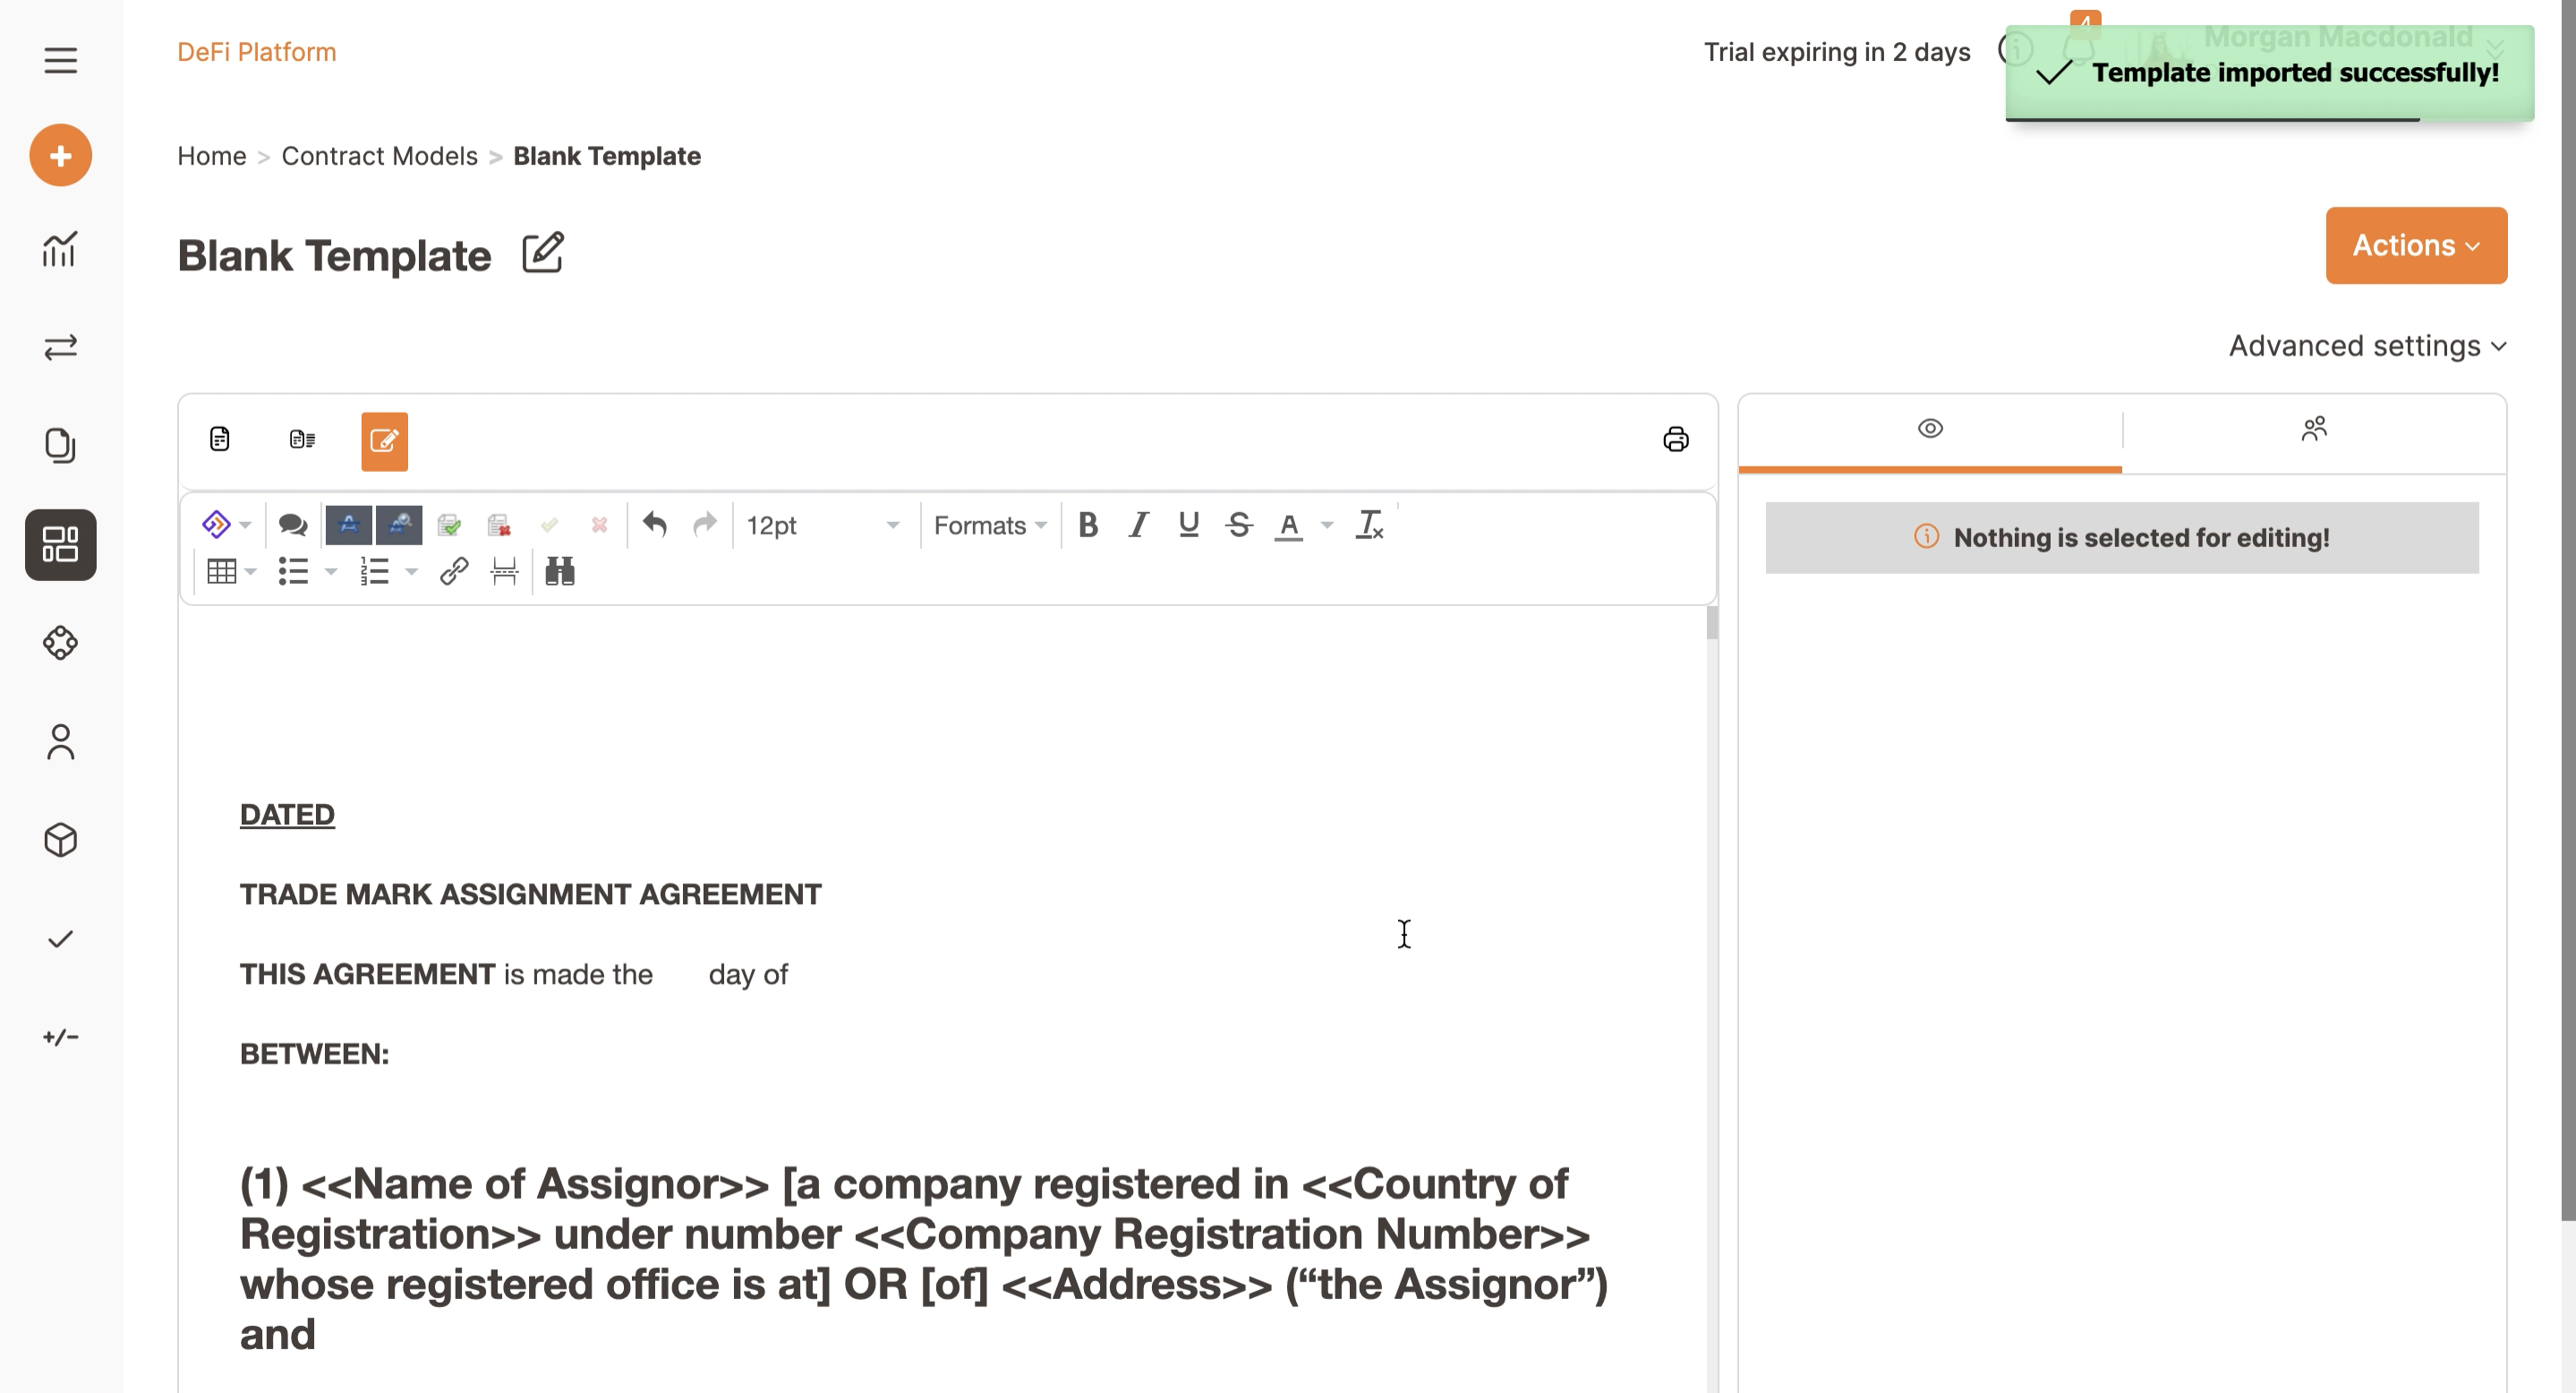
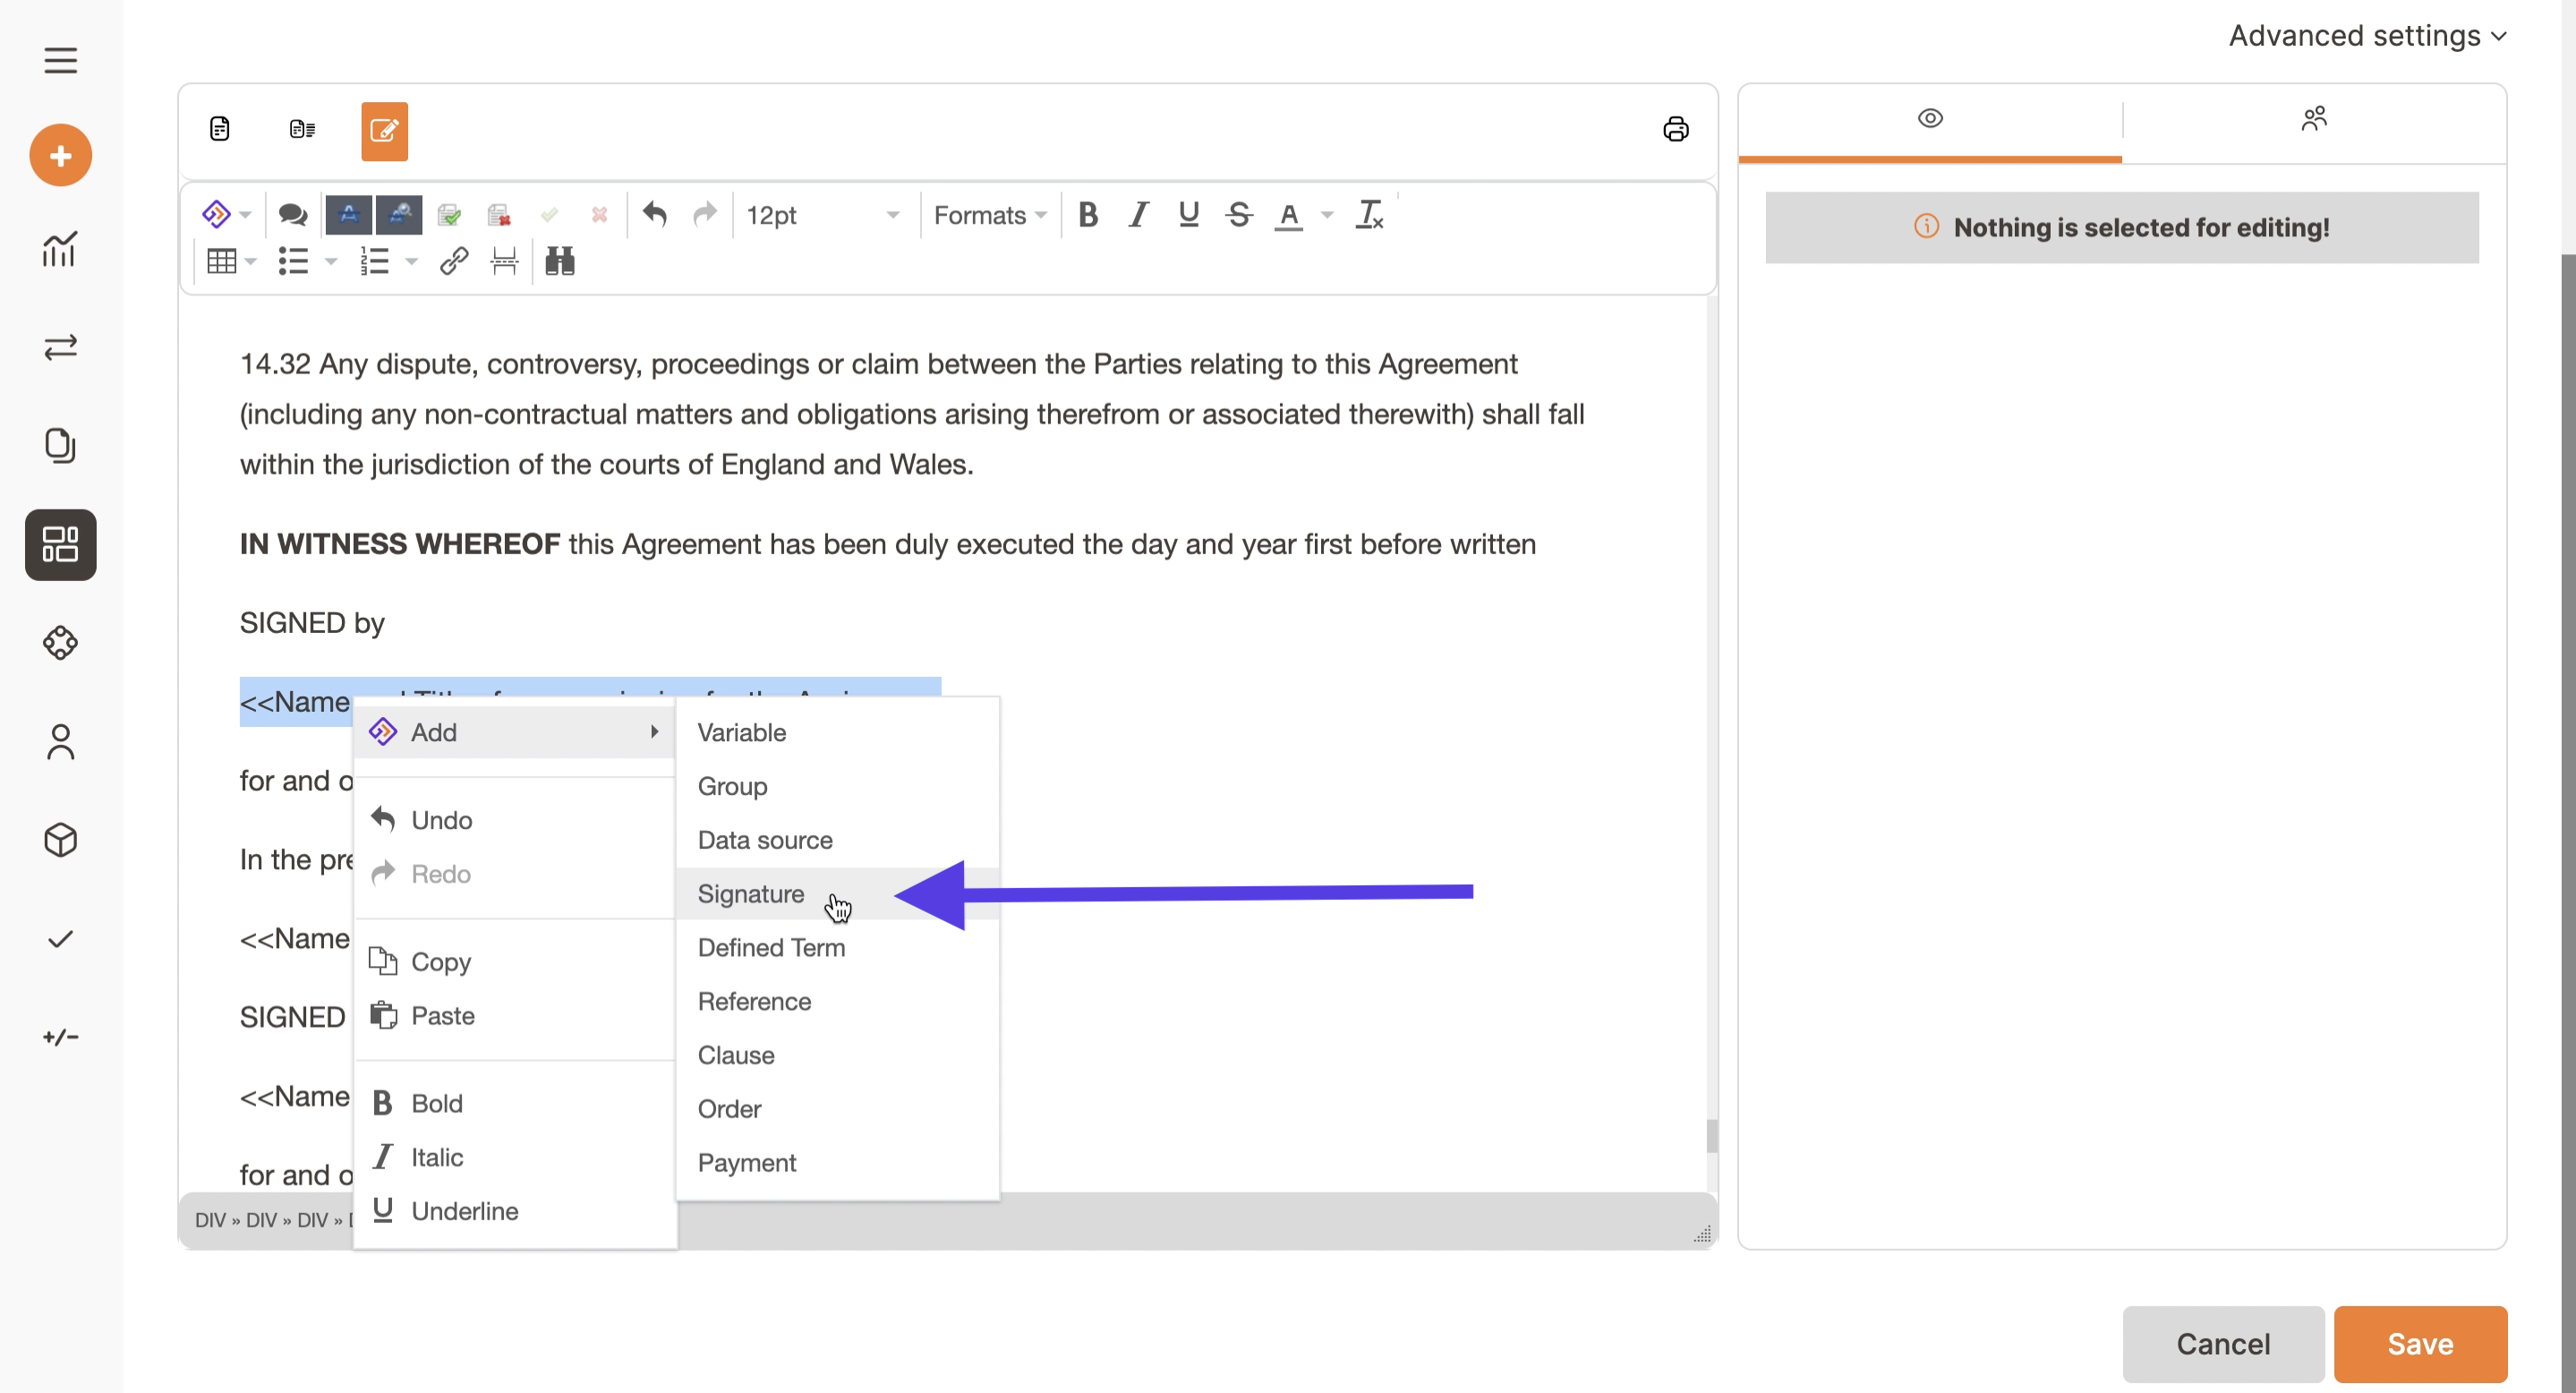
From here add all items you need: variables, signatures, clauses, etc...
You can add the items from the Trakti icon at the top left of the editor or by right clicking where you want to add the item.

Remember to save changes frequently. Click on the save button regularly to avoid losing your work.
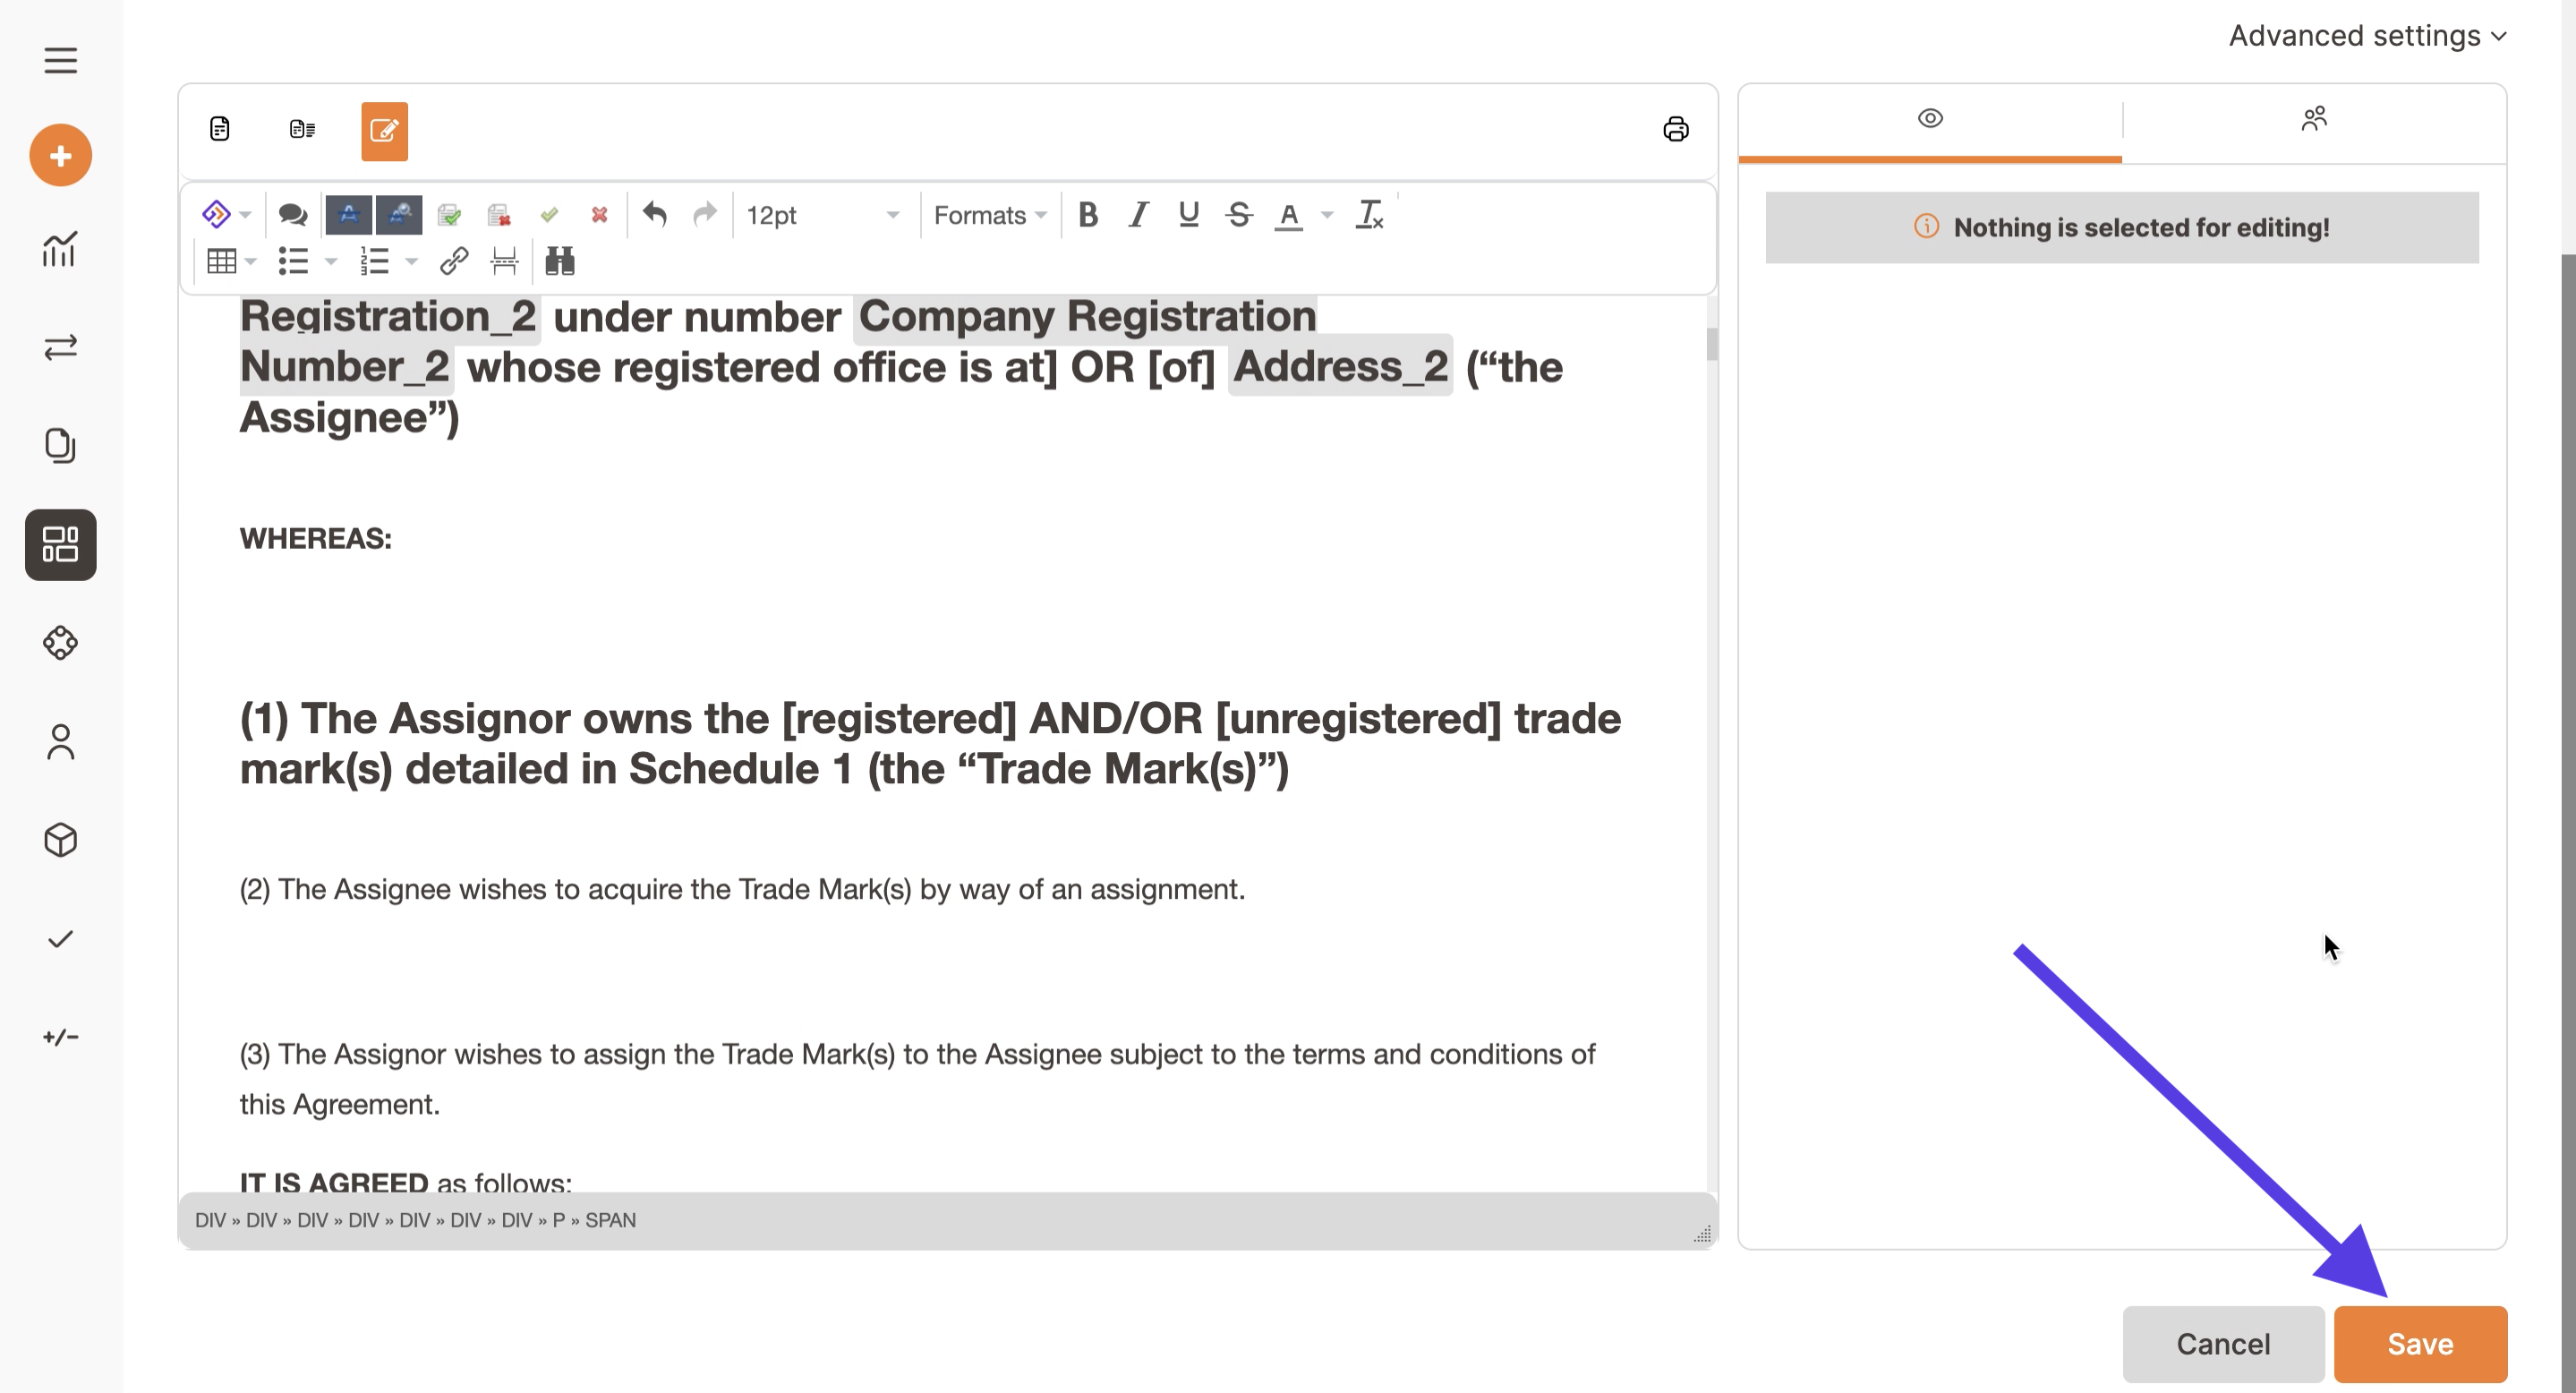
Please notice that Trakti has an automatic log out feature and therefore if you do not work on it for some time the system will automatically log you out and you can lose all the modelling done if not saved.
You can add all signatures you need and even KYC / AML fields (for Advanced and Corporate Plans only). To see how to set up KYC and AML click here.
and you can also add metadata information by clicking on Advanced settings to classify and facilitate the indexing of your model.

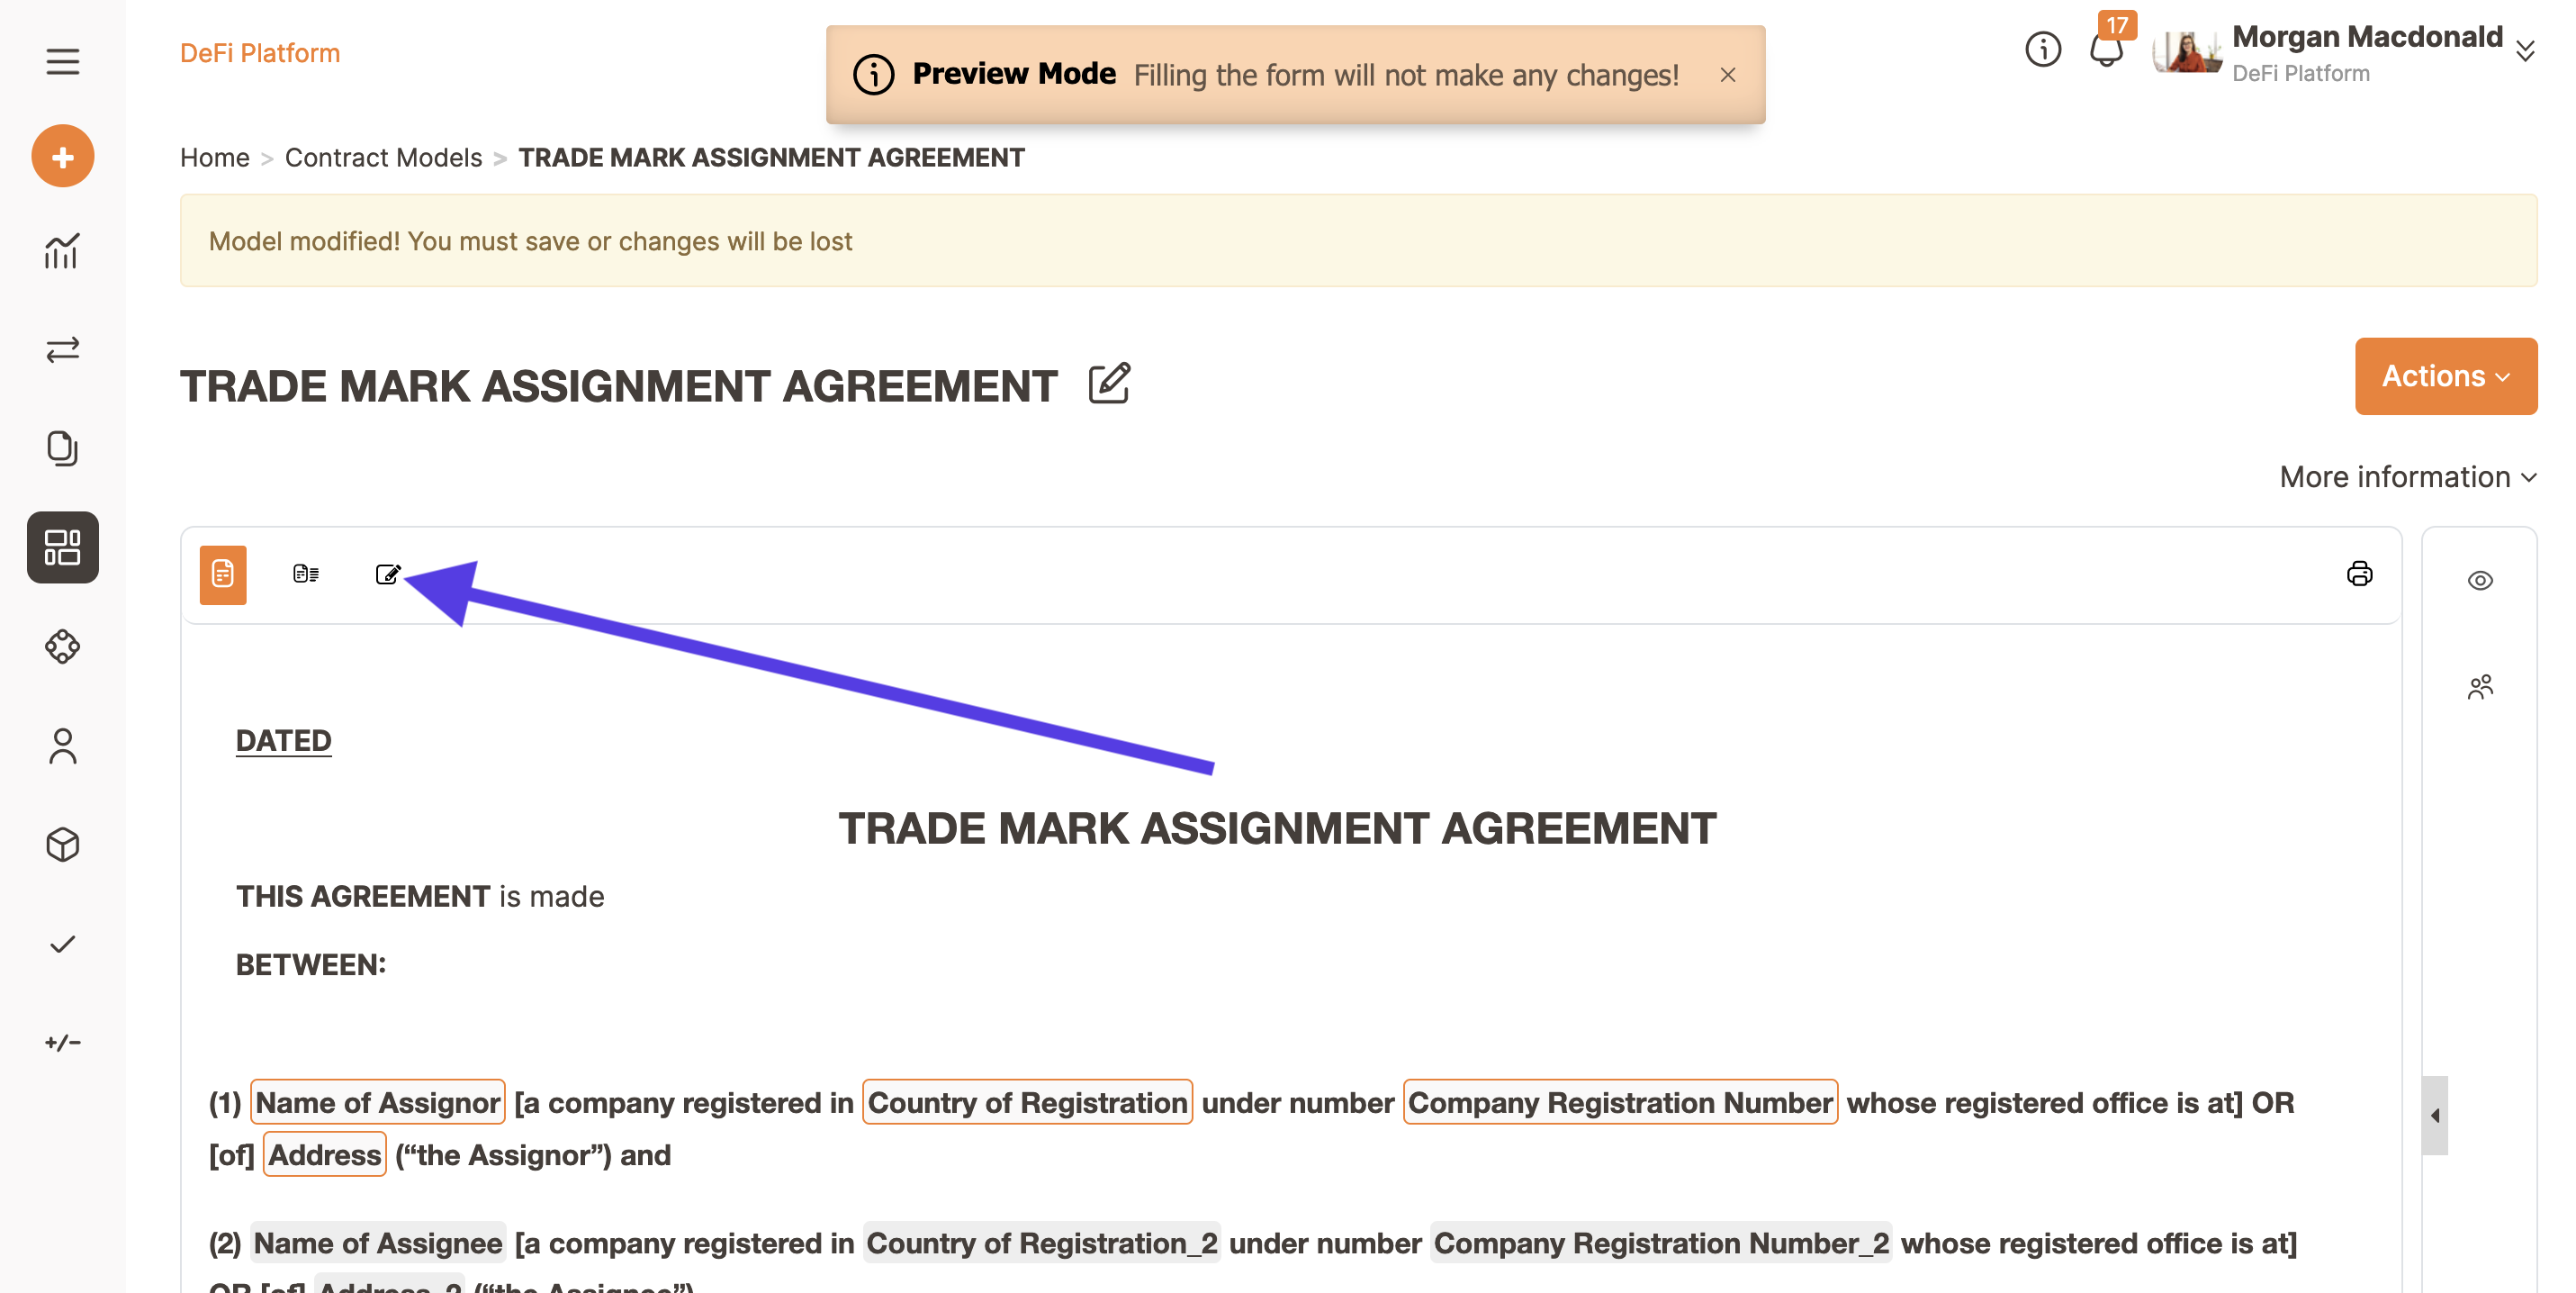
There is the possibility to check how the model will work by clicking on the Preview button.
The Preview functionality gives the possibility to test the model and check if all the formulas and variables types and formulas are correctly working. To return to edit you have to click on the edit button as shown in the following image.
Once you think that all the editing is completed, then you are ready to Publish your new model and make it available to all the other colleagues.
Click on the Actions button and select Publish.
By clicking on Publish a new dialog window will appear. This is the Authorisation module that can be used to seek approval from team members authorised to create new legal templates in your organisation (General Council, Procurement Director, Sales Director, HR Director, CEO and others).