KYC/AML use in models

Dennis
Last Update 2 years ago
Now that all the bundles are ready to be used, let's have a look at their integration in one of your models.
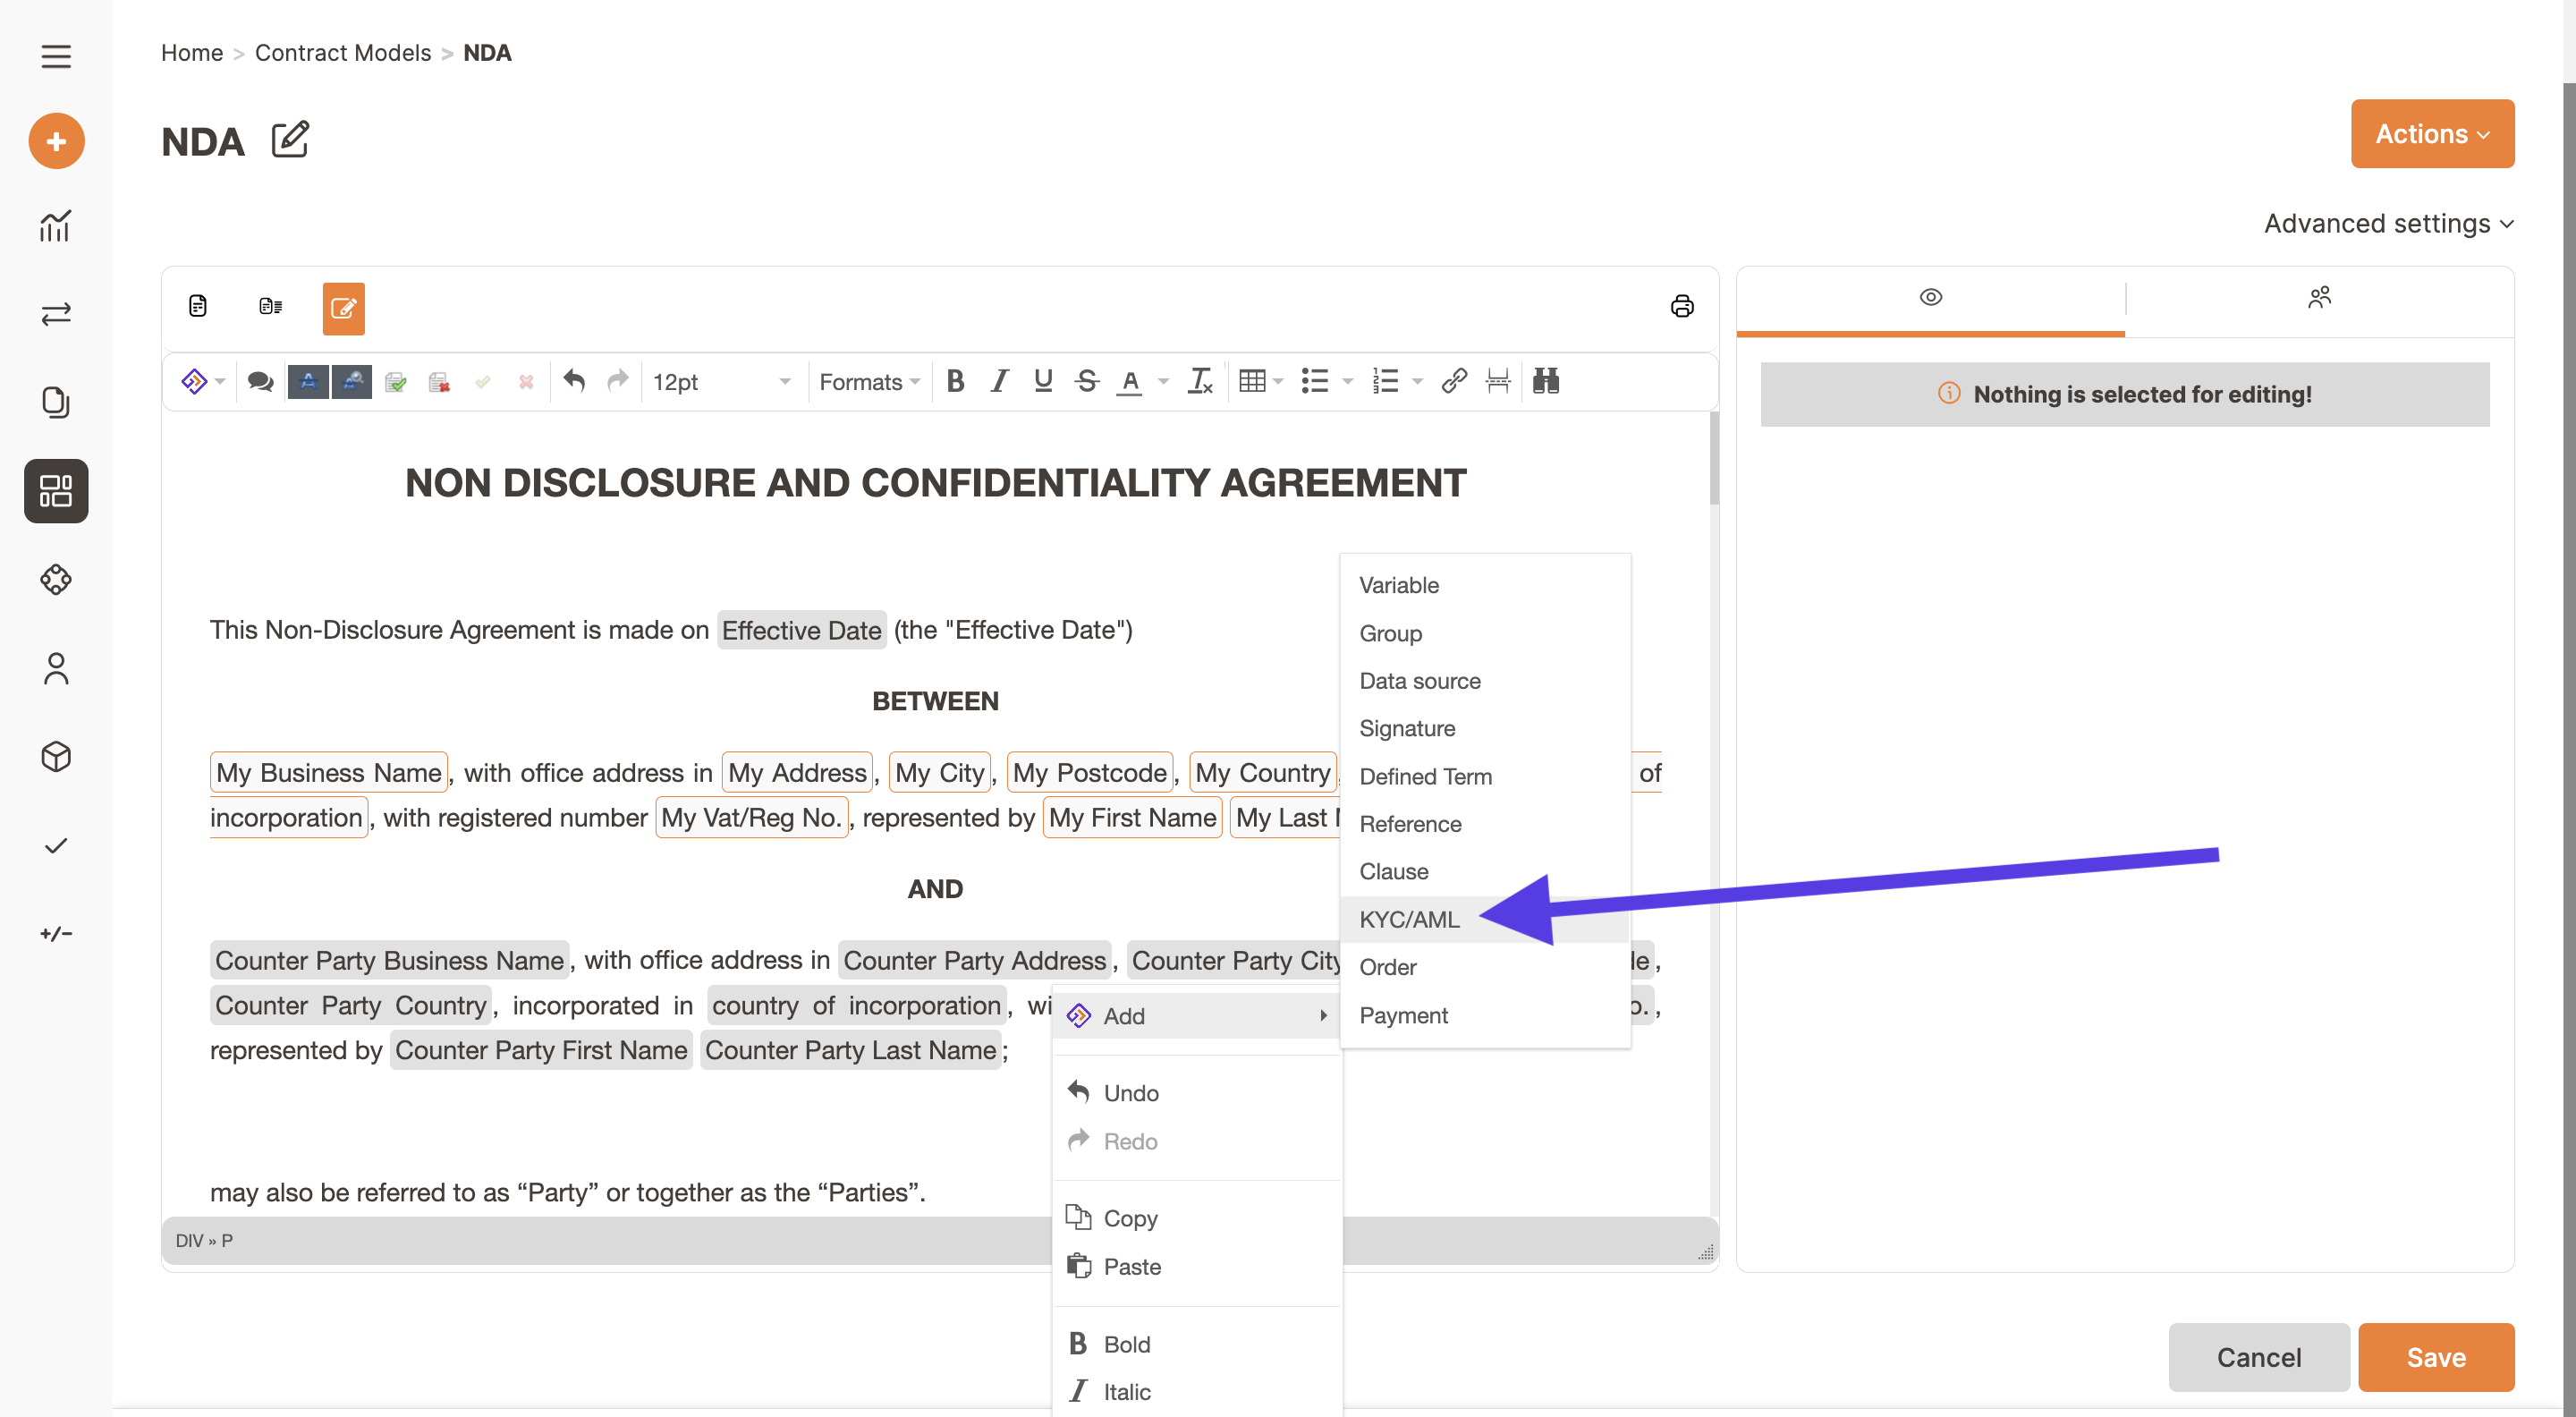
Please select one model in draft stage or create a new one and after selecting the right place, click on the Trakti icon or right click on the same spot, this will open up the menu where you have to select KYC/AML field. Now the editing box will open on the right side of the model.
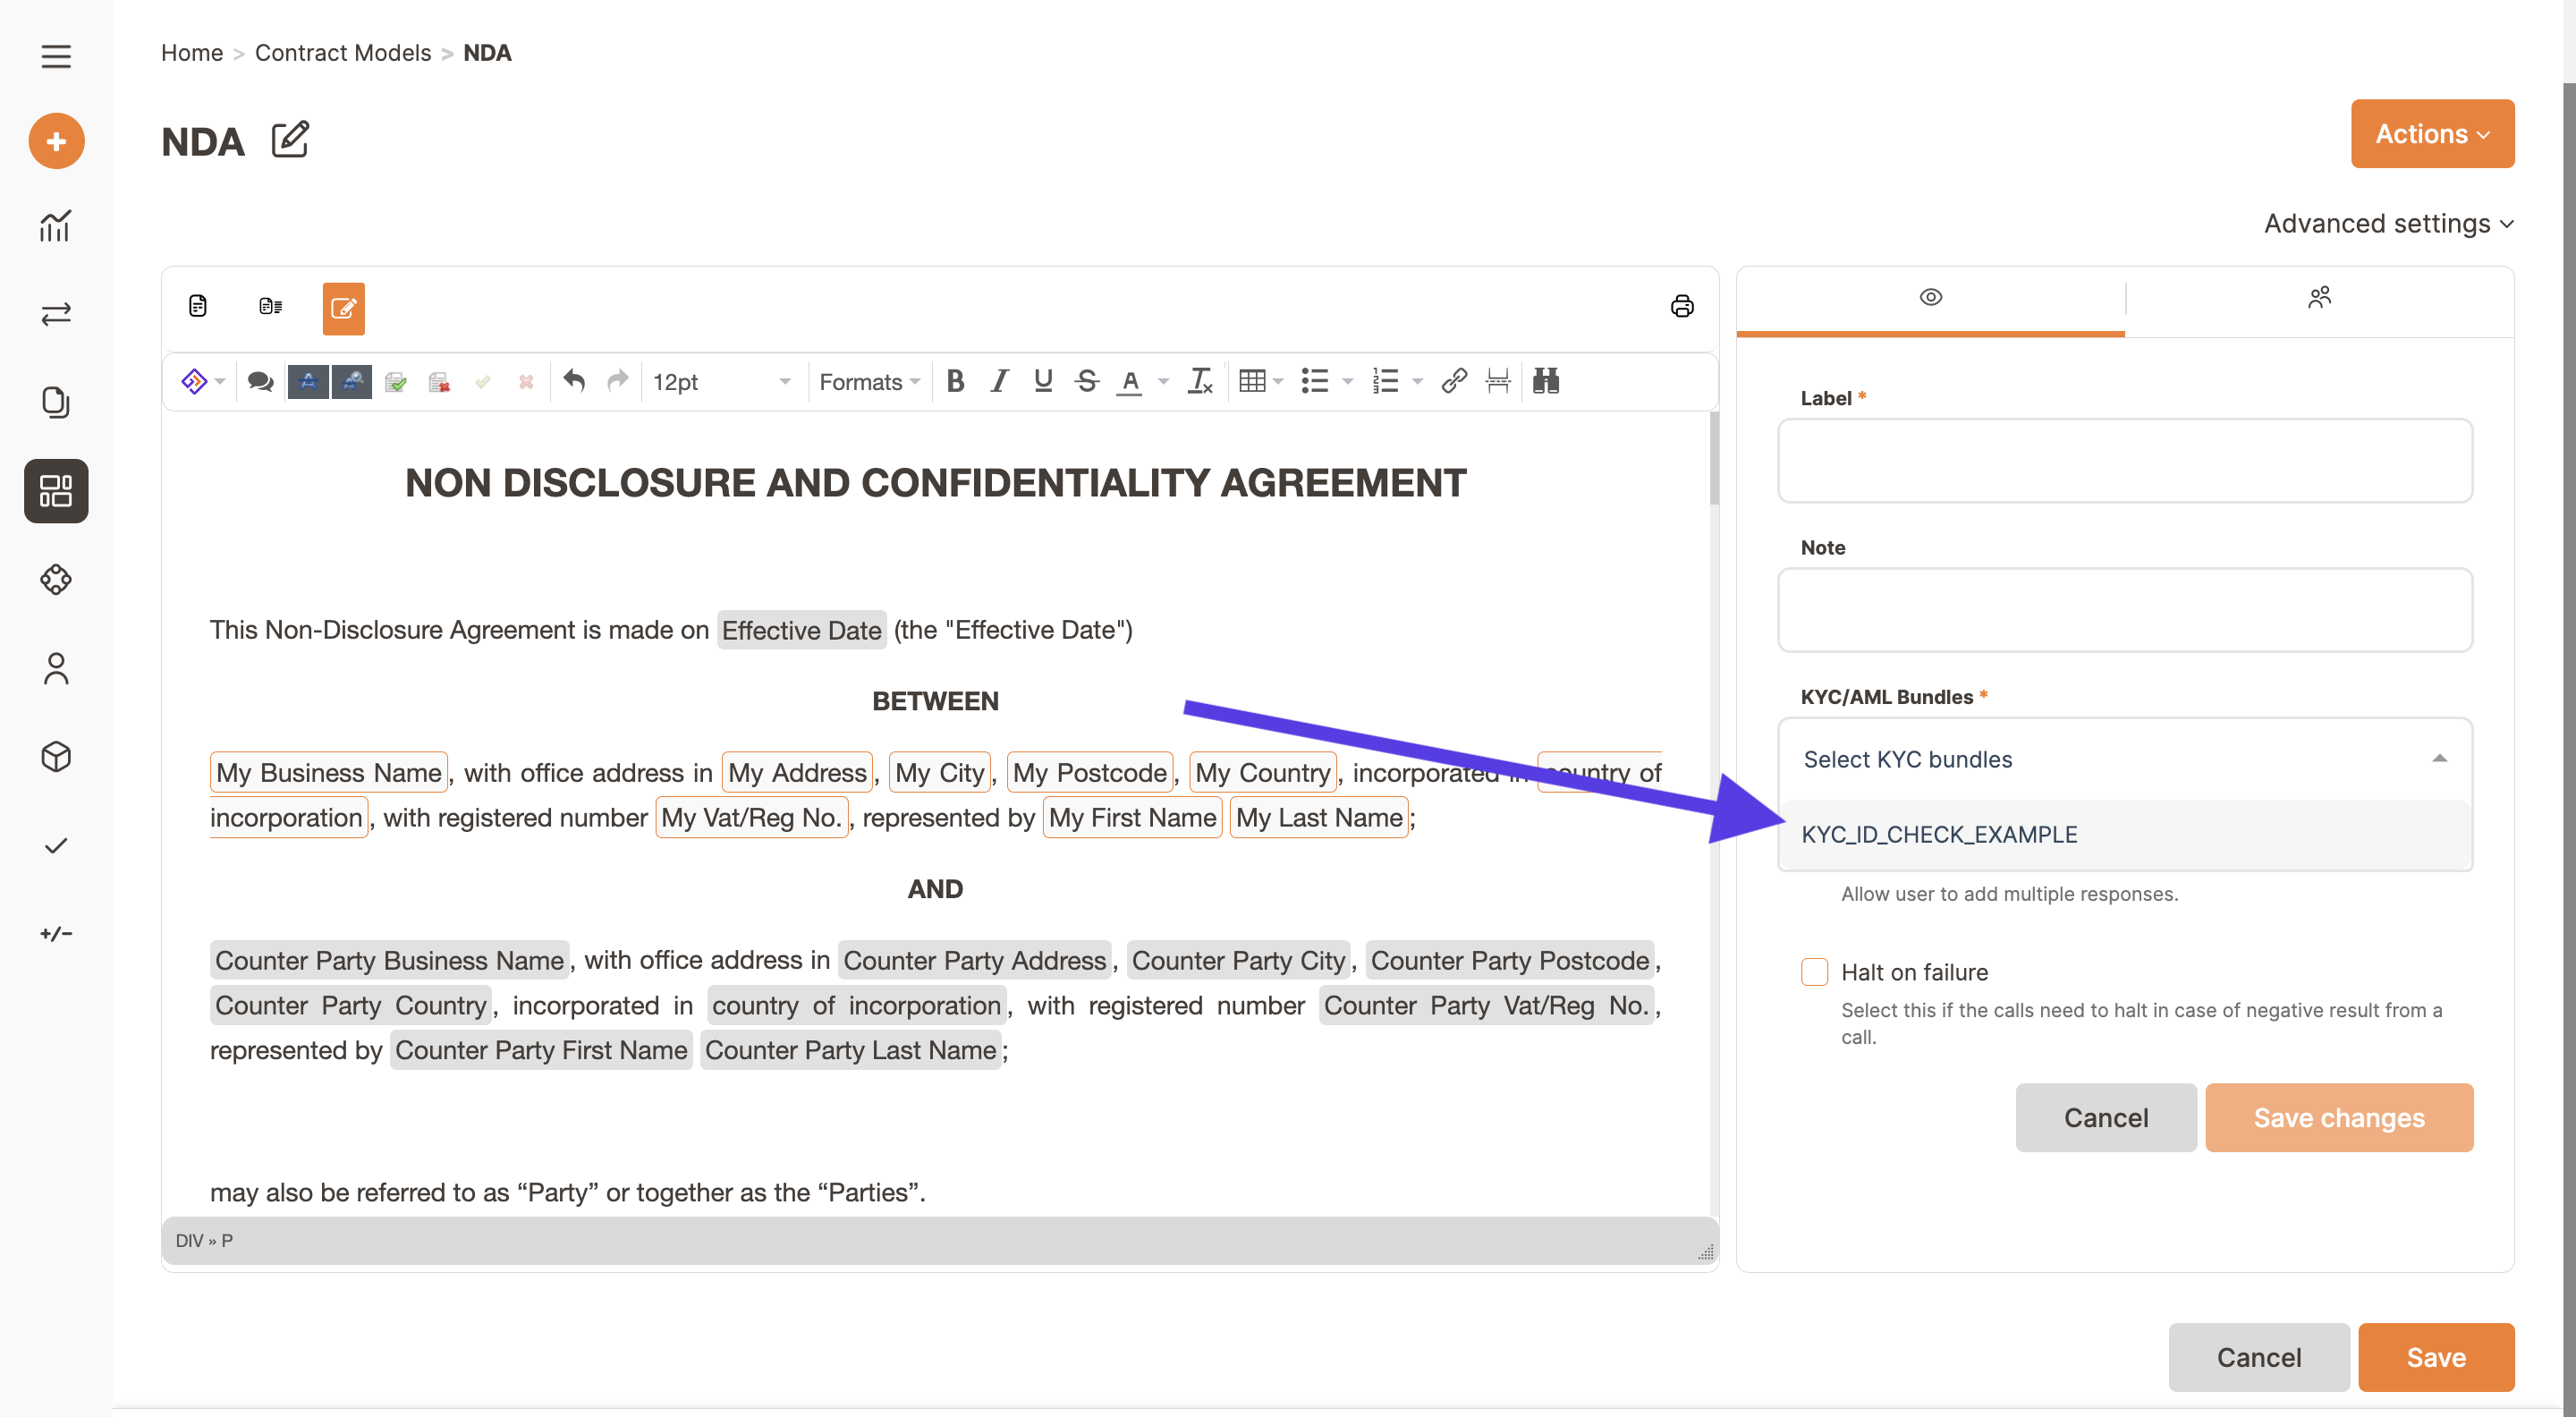
In a dropdown menu, you can see all the bundles you have previously activated in Trakti. You can list all the checks you need, you can even allow all checks for different countries in a unique field or you can just list the ones you need in case you have a model focused on a specific market (eg. the US).
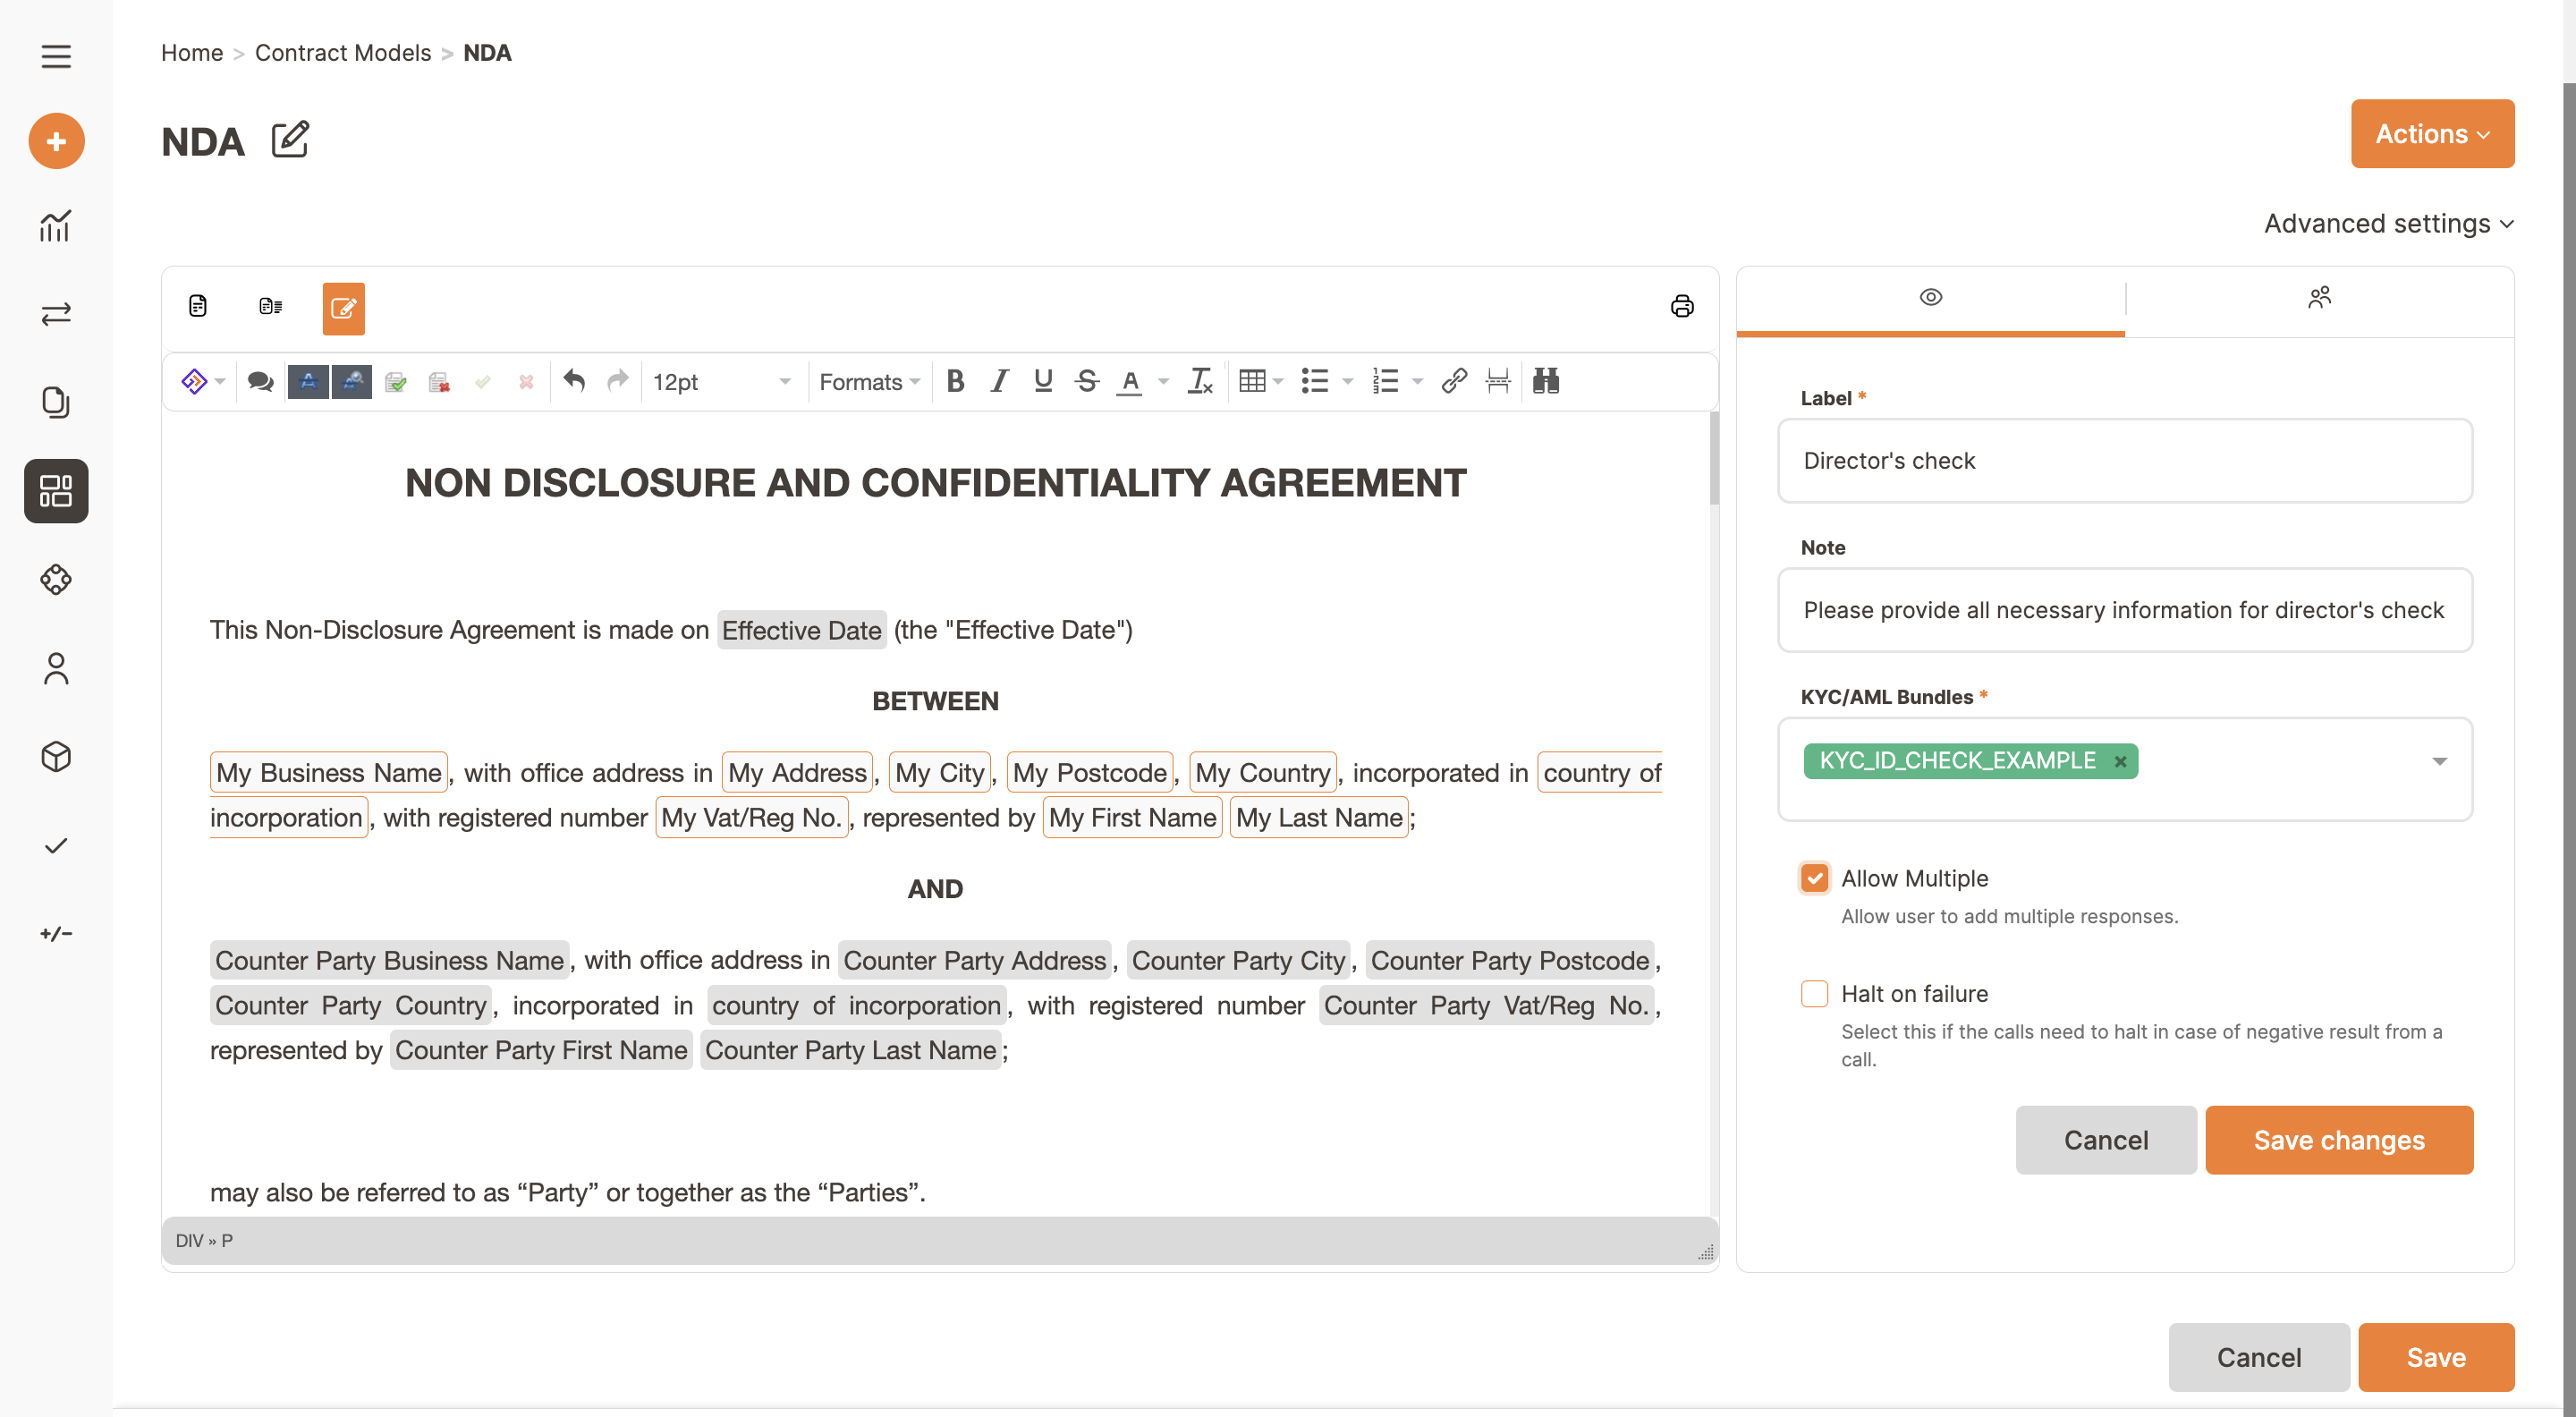
Enter a label and a note to give instructions to the counter party. In case you need to run checks for several individuals please remember to flag the Allow Multiple checkbox. Then save to finalise the creation of the field that will now appear in your document.
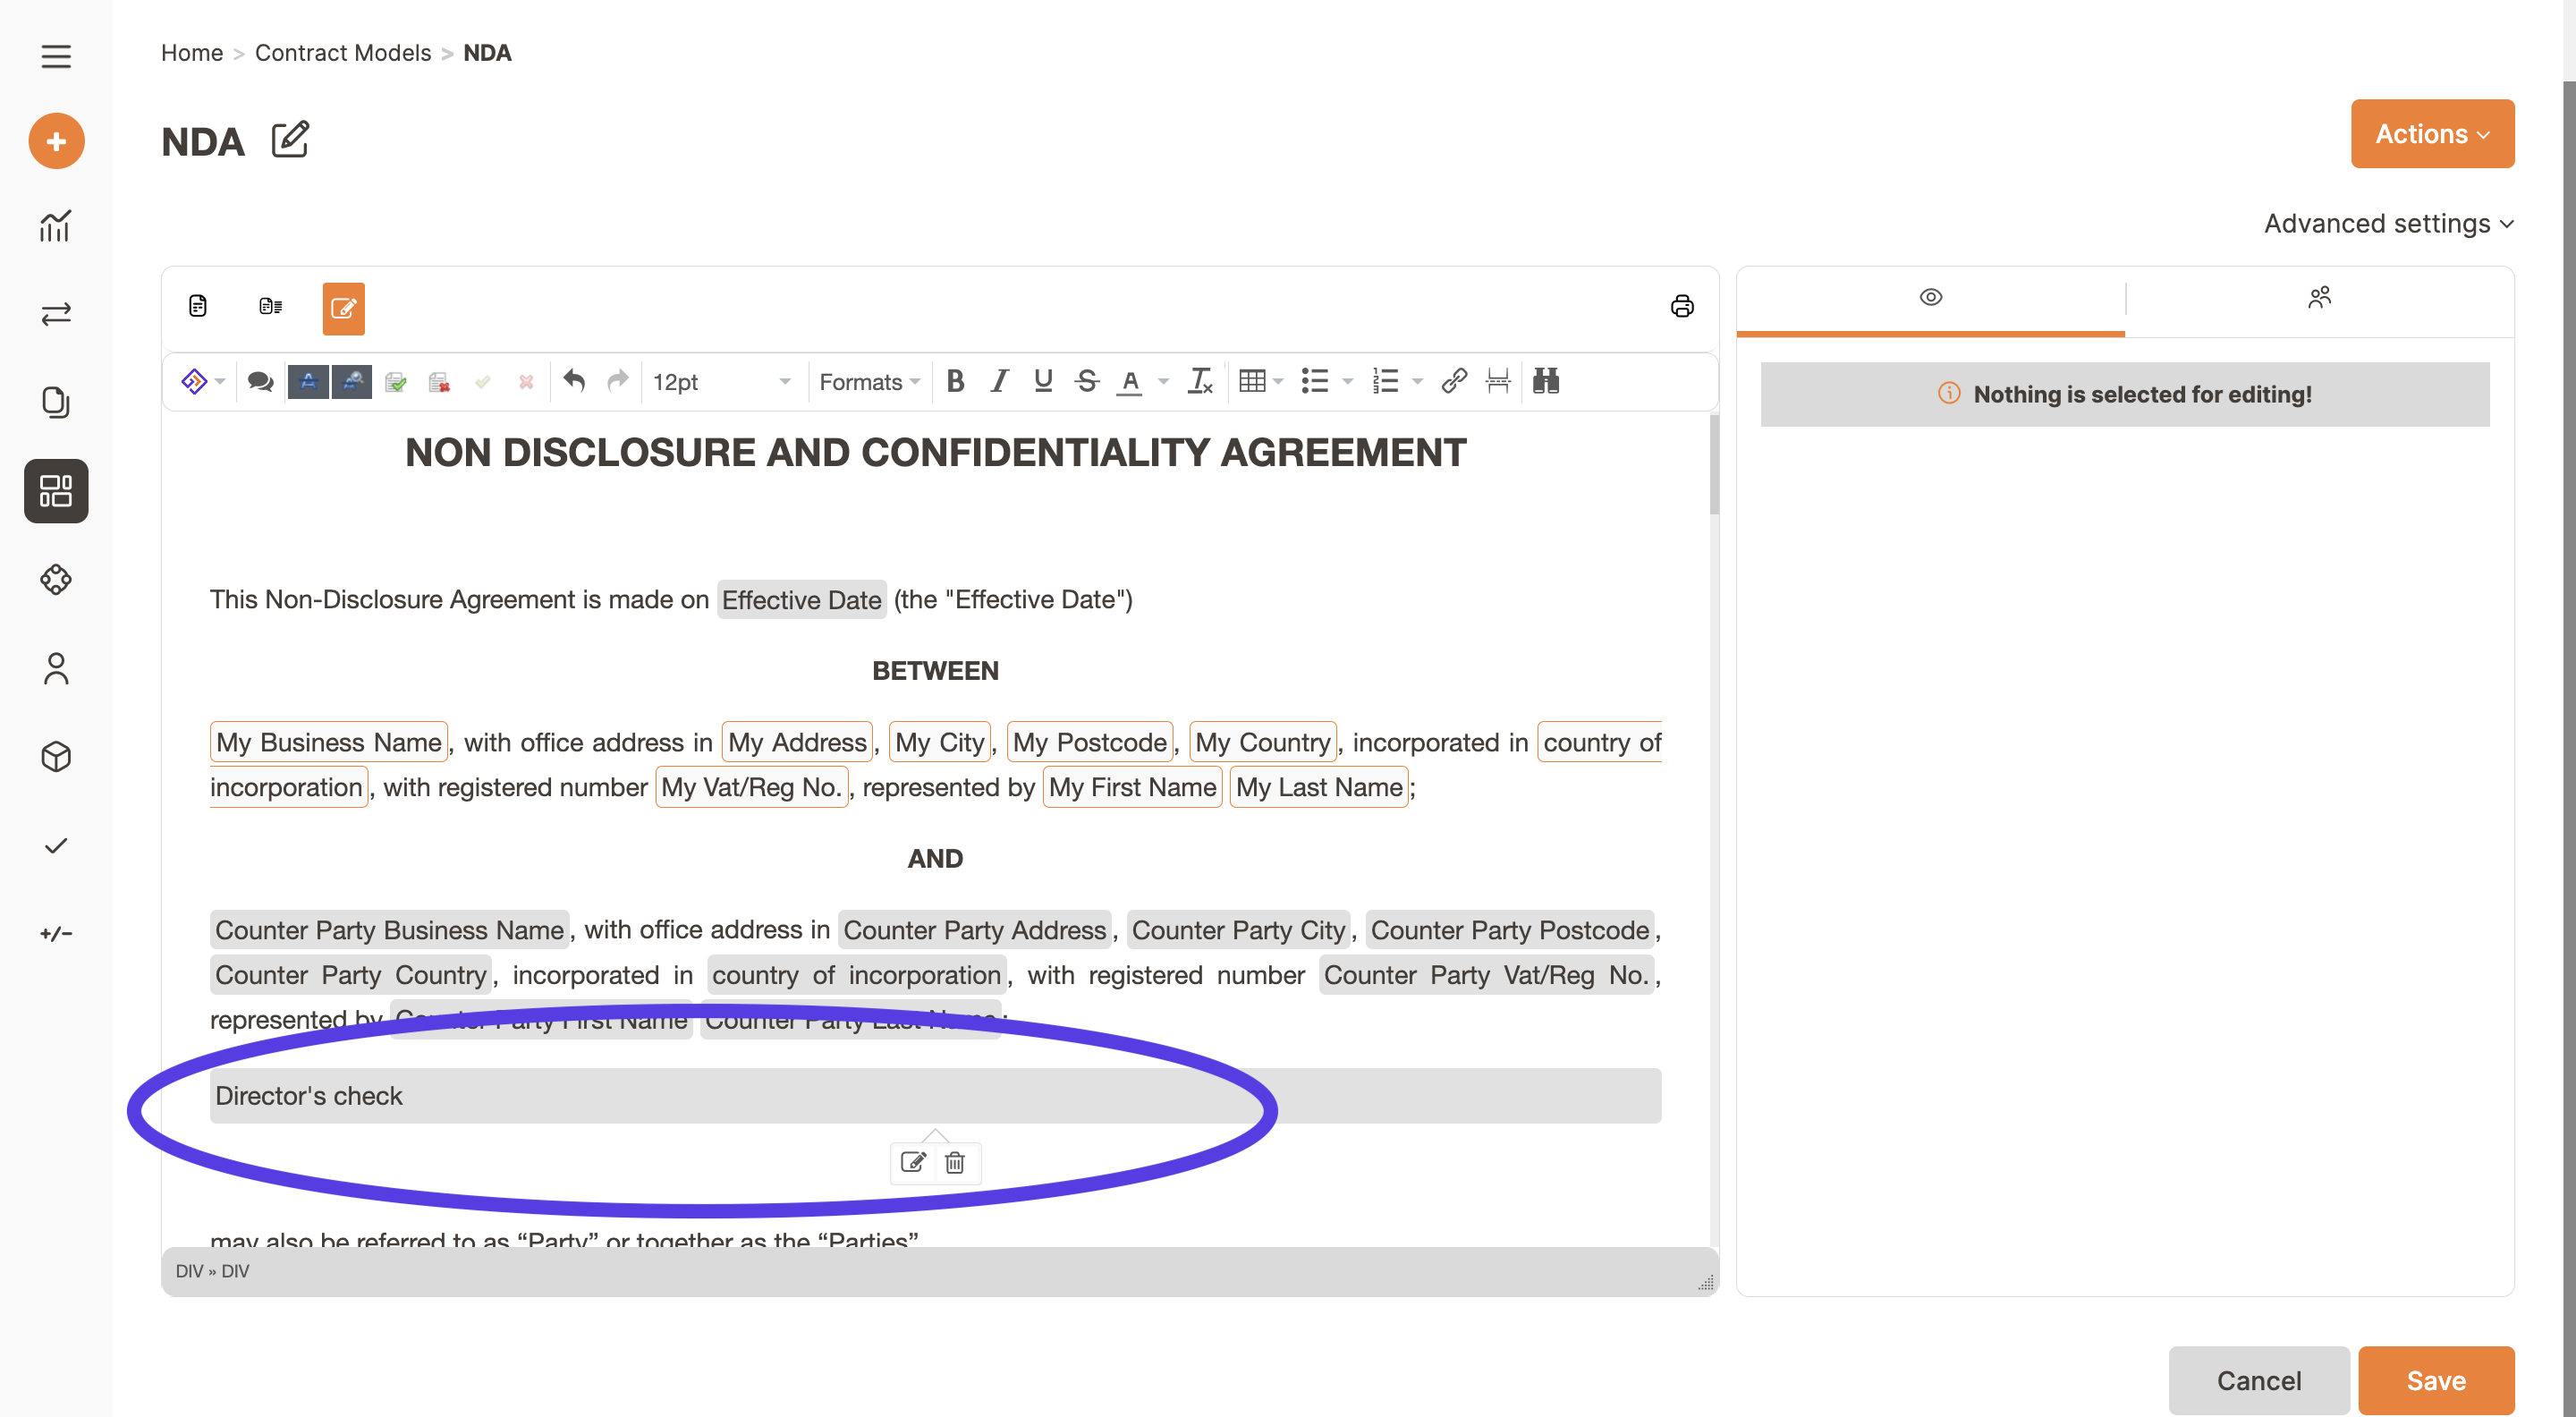
Now your KYC/AML field is in your model. You can edit anytime to add more checks, to change the Label or the Note or to delete it, by clicking on the edit button of the field accessible by clicking on the field in the model. You can also do that during deal setup by entering in the edit function.
After saving, by clicking on the Preview button you can check how the model behaves. You can see all the fields the bundles you inserted require and you can check if you correctly flagged the Allow multiple checkbox.
